I'm going to show you how to install and configure OpenClaw on an Android phone using Termux, Ubuntu in proot, and a free model via OpenRouter. We'll also set up Telegram as a communication channel and fix the dashboard disconnected error using the gateway token.
It's a more involved setup than a desktop Linux install, but the payoff is having a fully functional AI agent on your phone without needing external servers. Follow each step carefully.
Prepare Termux
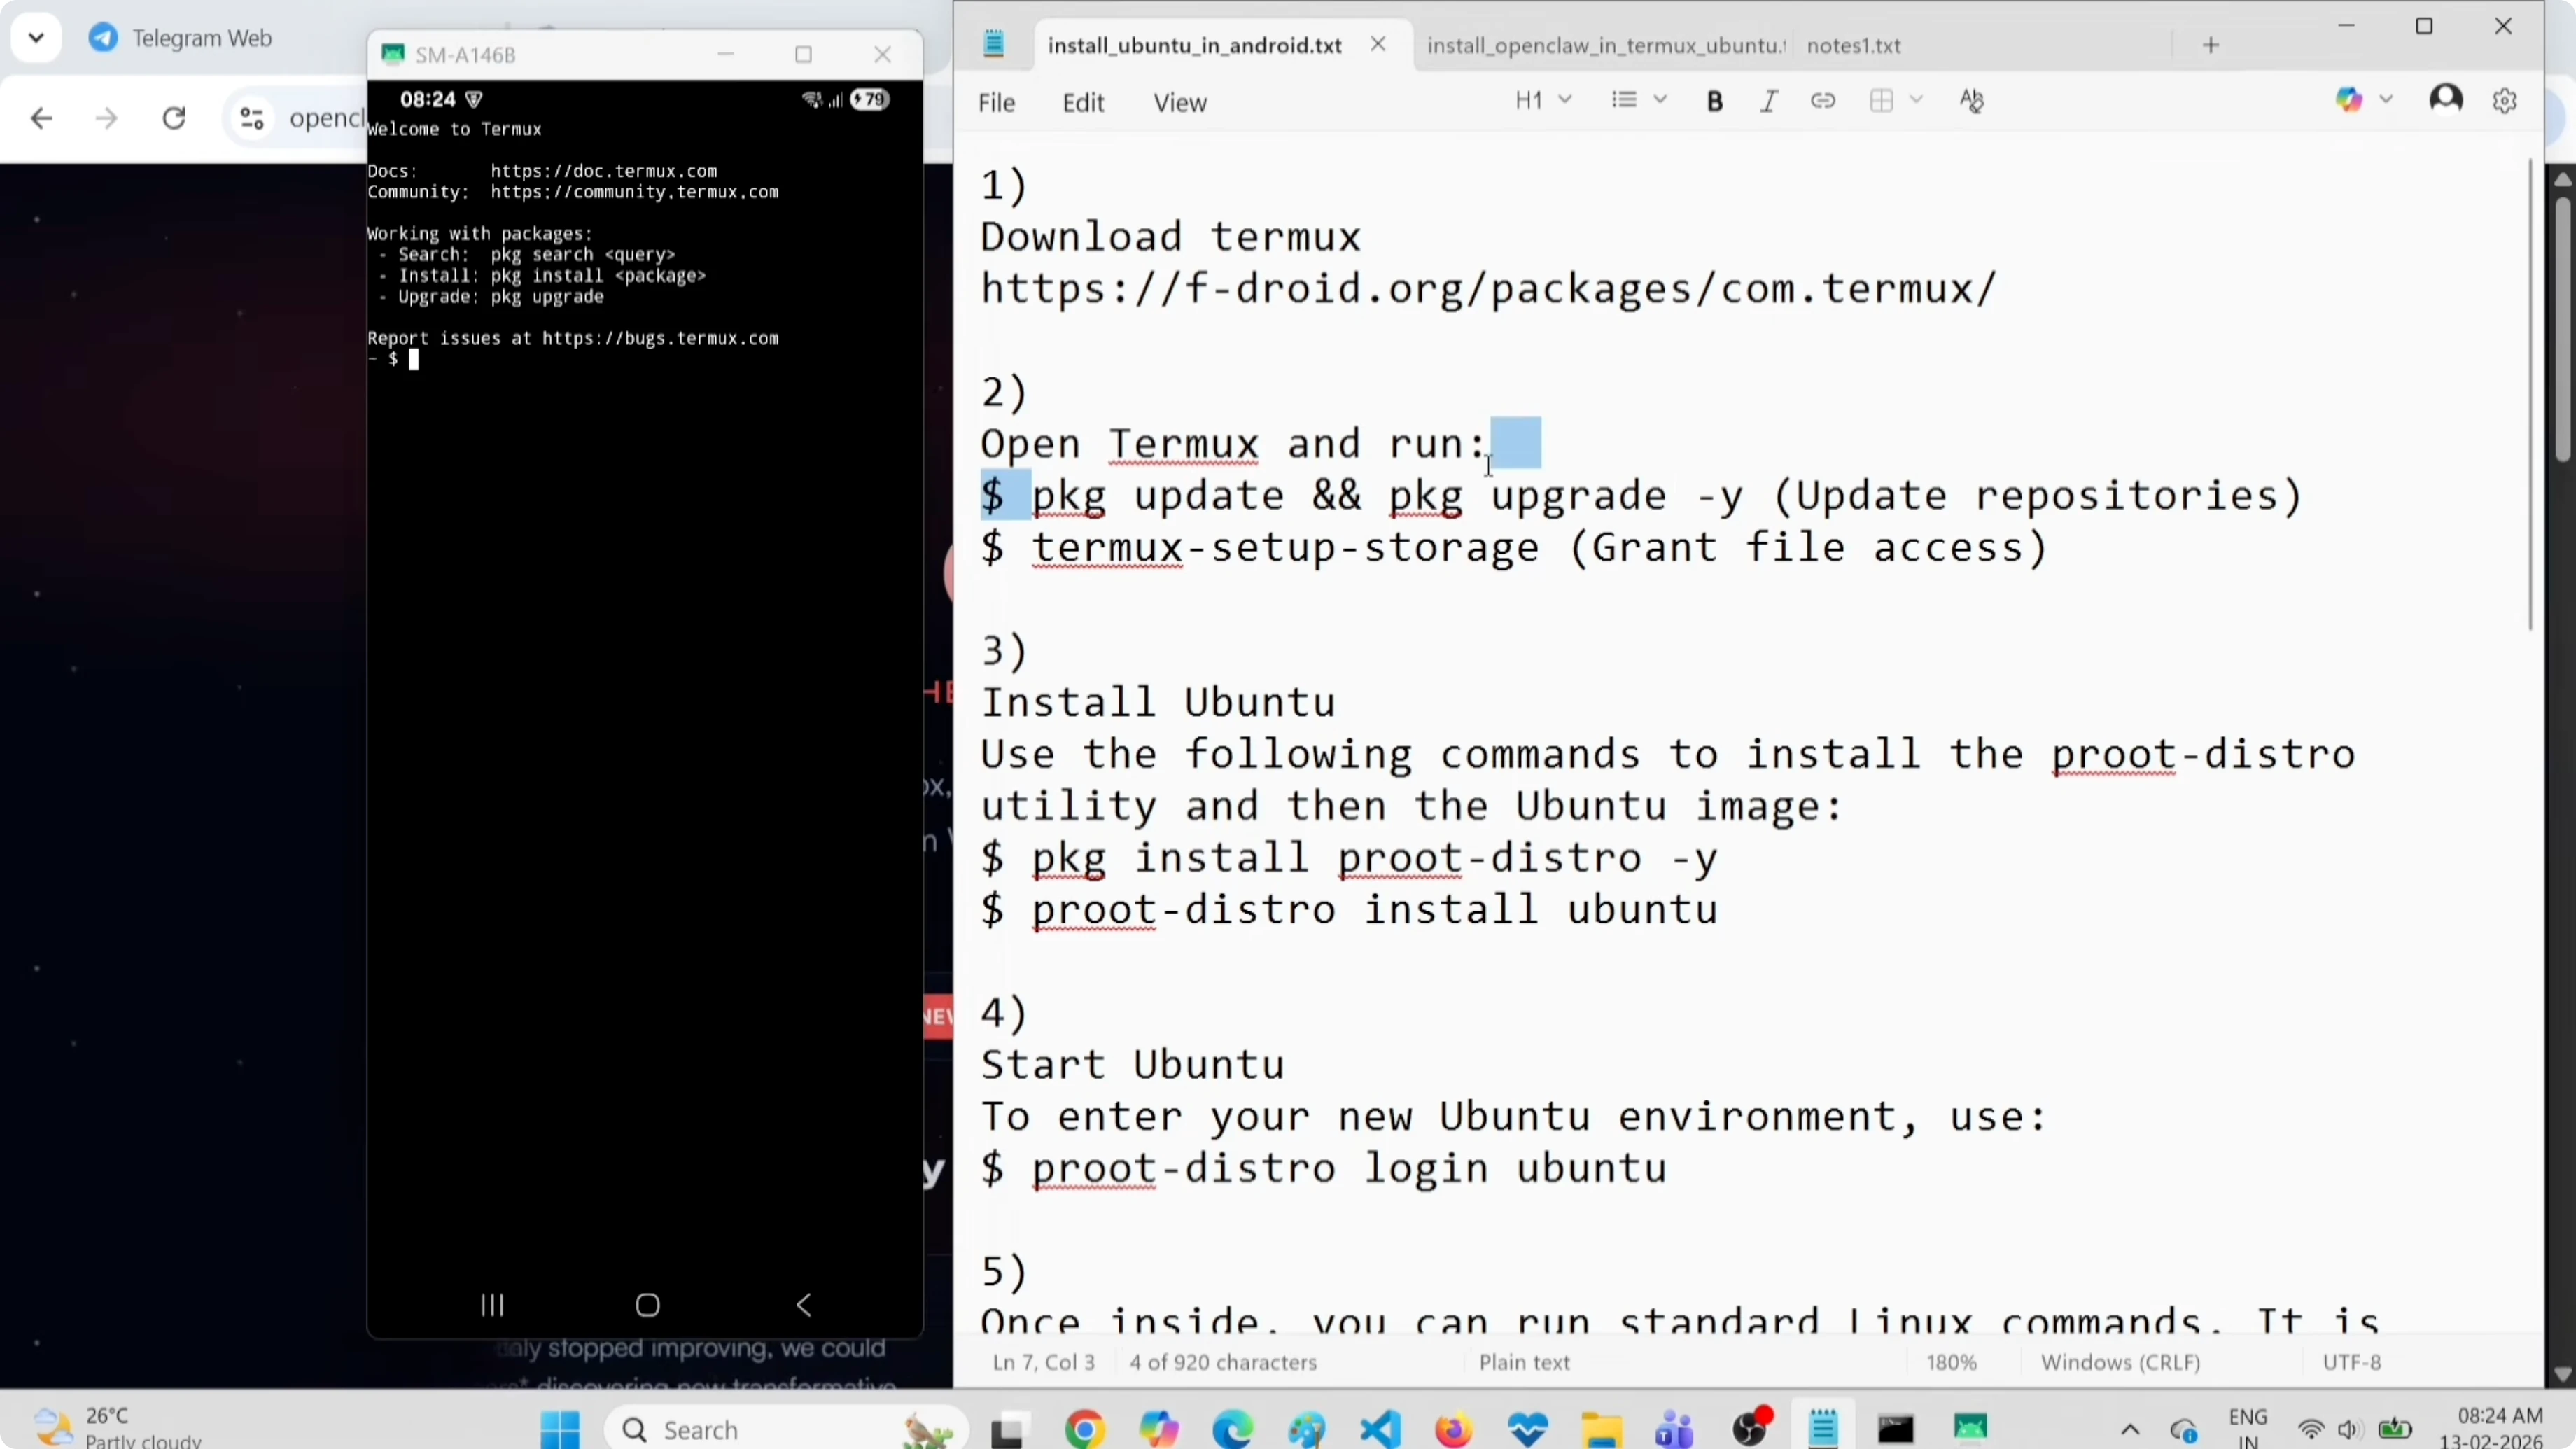
Install Termux from the Google Play Store (or F-Droid if you prefer) and open it. Termux gives you a full Linux terminal where you can run commands and install software. First, let's update Termux and grant storage access.

Run:
pkg update && pkg upgrade -y
termux-setup-storage
You'll see a permission screen. Scroll to find Termux, enable the file access toggle, and go back. Termux can now read and write to your phone's storage.
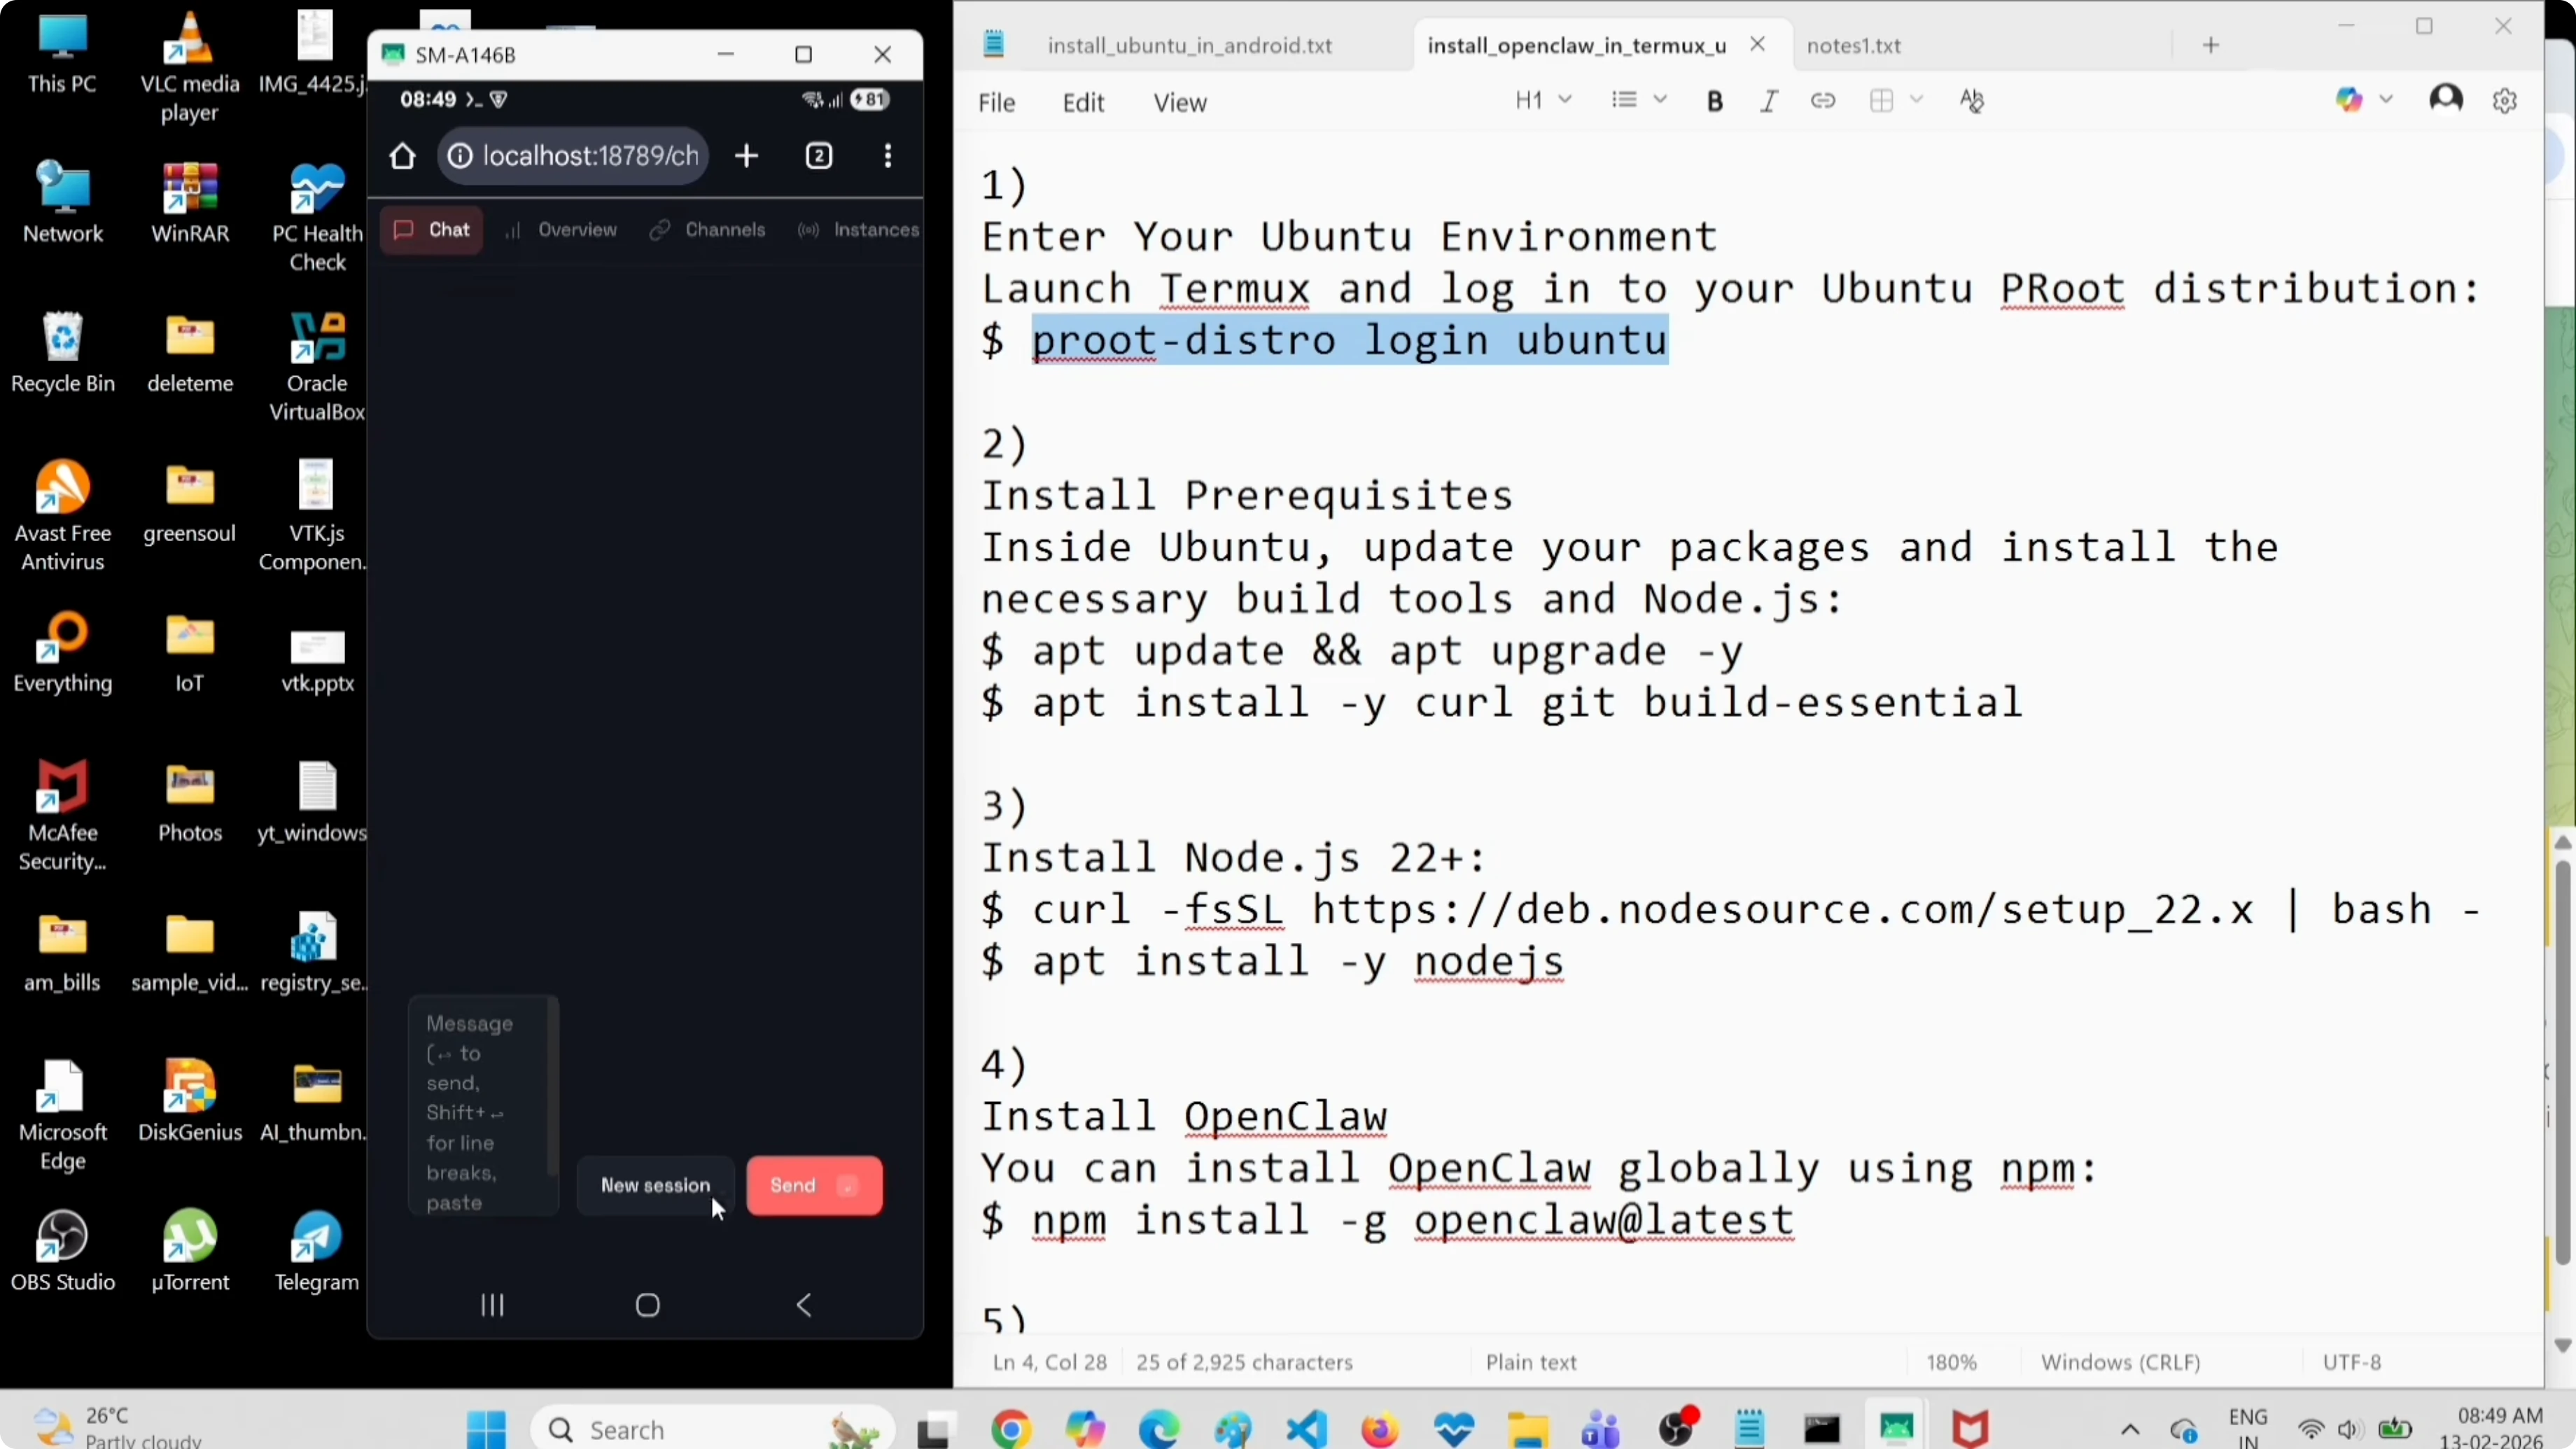
Install Ubuntu in Termux with proot-distro
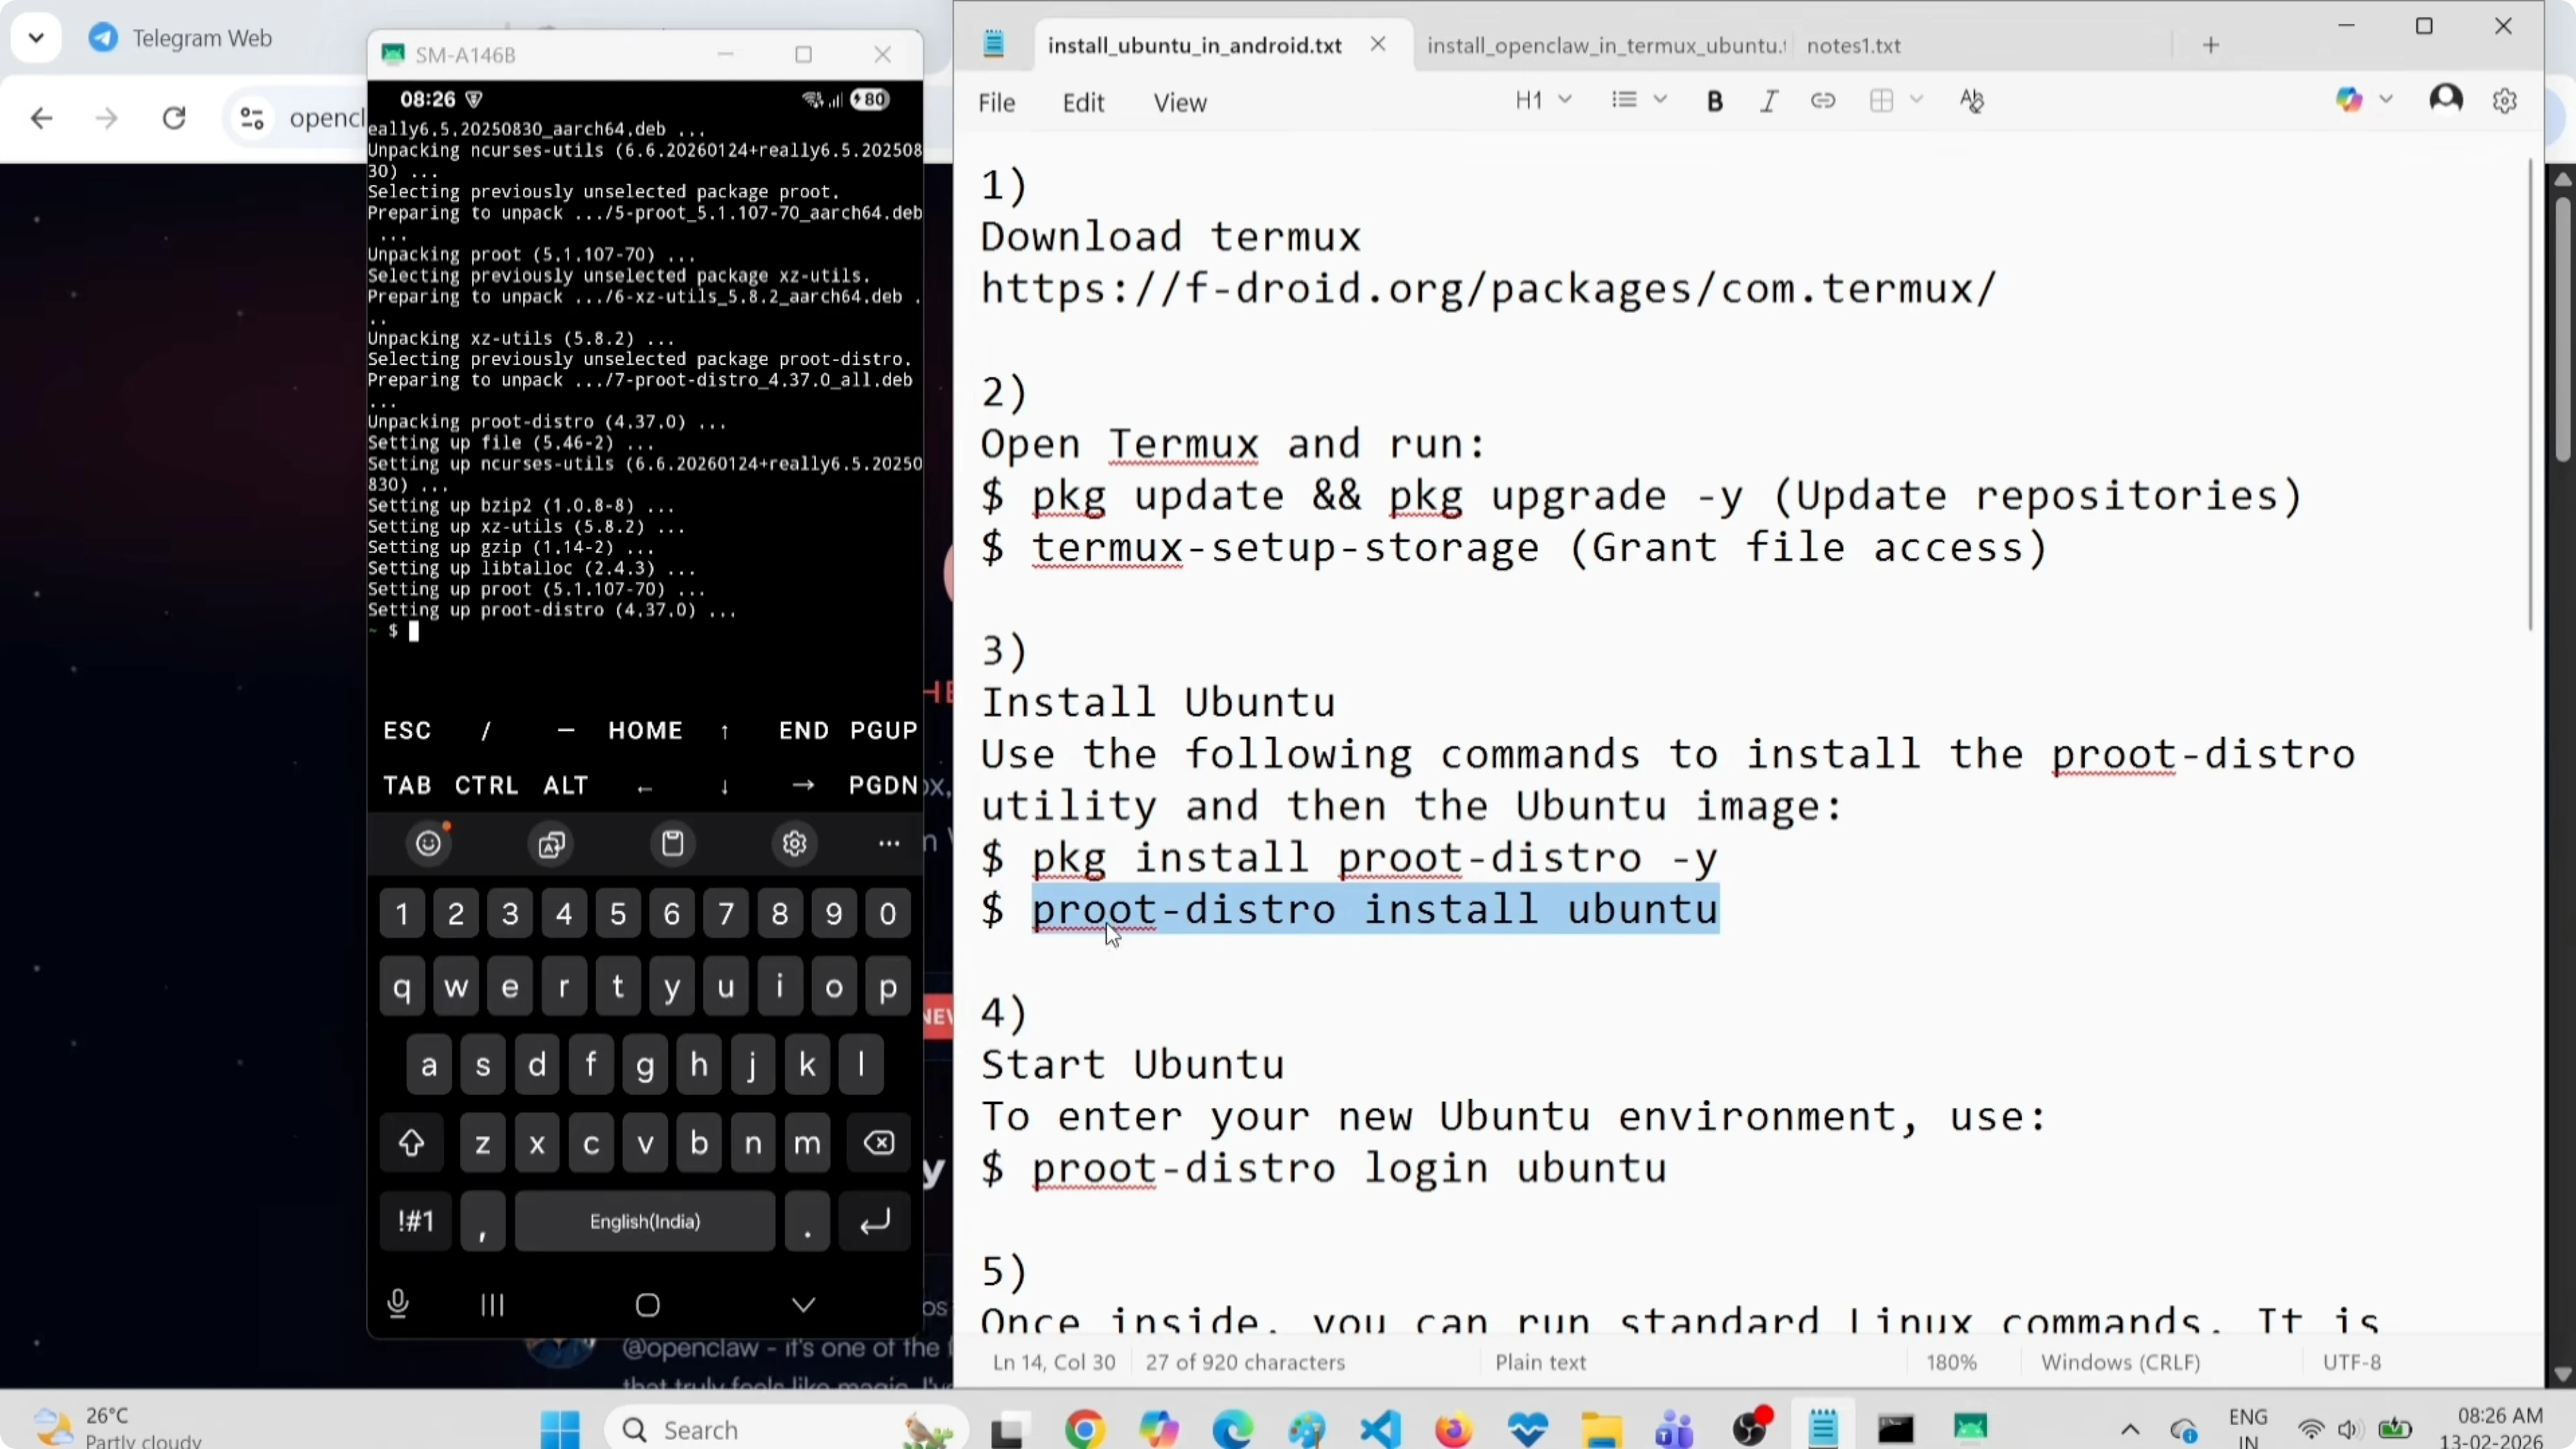
OpenClaw needs a full Linux environment. We'll use proot-distro to run Ubuntu inside Termux without requiring root access. Install proot-distro, download Ubuntu, and log in:
pkg install proot-distro -y
proot-distro install ubuntu
proot-distro login ubuntu
You're now inside Ubuntu Linux. All the following commands run in this Ubuntu environment.
Need help with AI integration?
Get in touch for a consultation on implementing AI tools in your business.
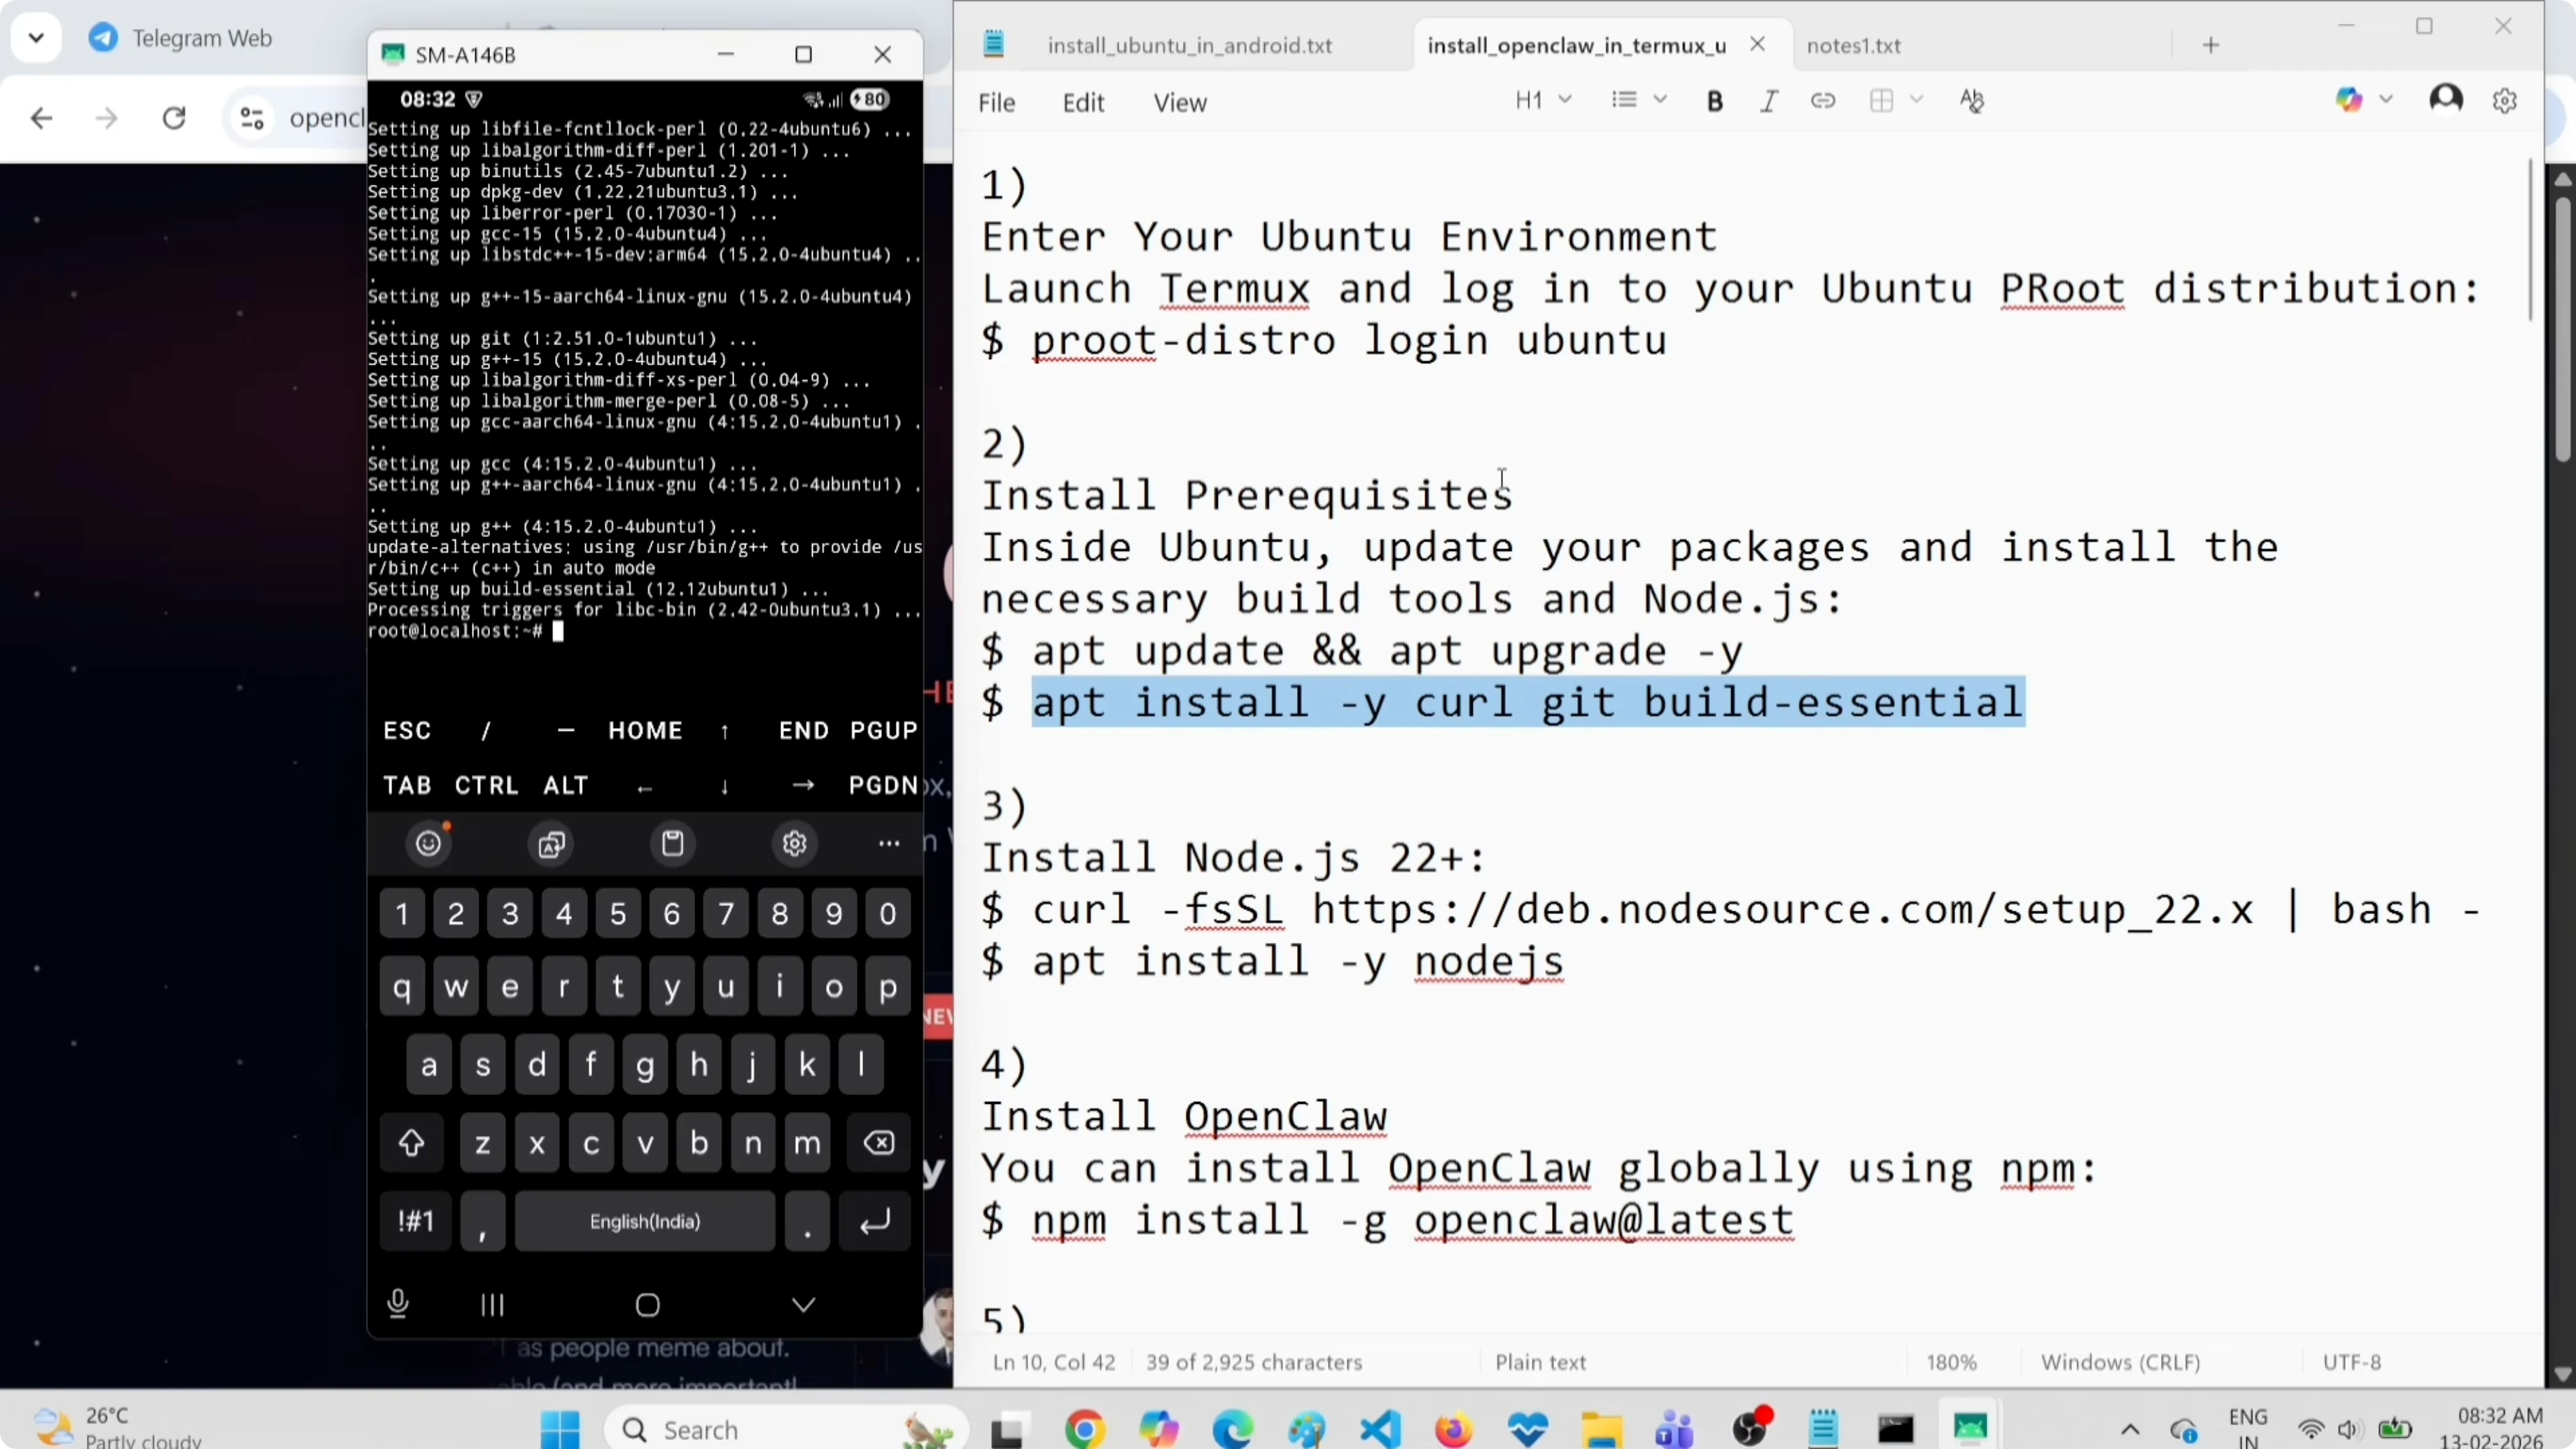
Update Ubuntu and install dependencies
Let's update Ubuntu repositories and install essential packages: curl, git, and build-essential. This can take a few minutes.
apt update && apt upgrade -y
apt install -y curl git build-essential
These tools are needed to install Node.js and compile any native OpenClaw modules.
Install Node.js and OpenClaw
Install Node.js 20 via NodeSource and then OpenClaw globally via npm:
curl -fsSL https://deb.nodesource.com/setup_20.x | bash -
apt install -y nodejs
node -v
npm -v
npm install -g openclaw
OpenClaw is now installed. Verify that openclaw is available by typing openclaw --version.
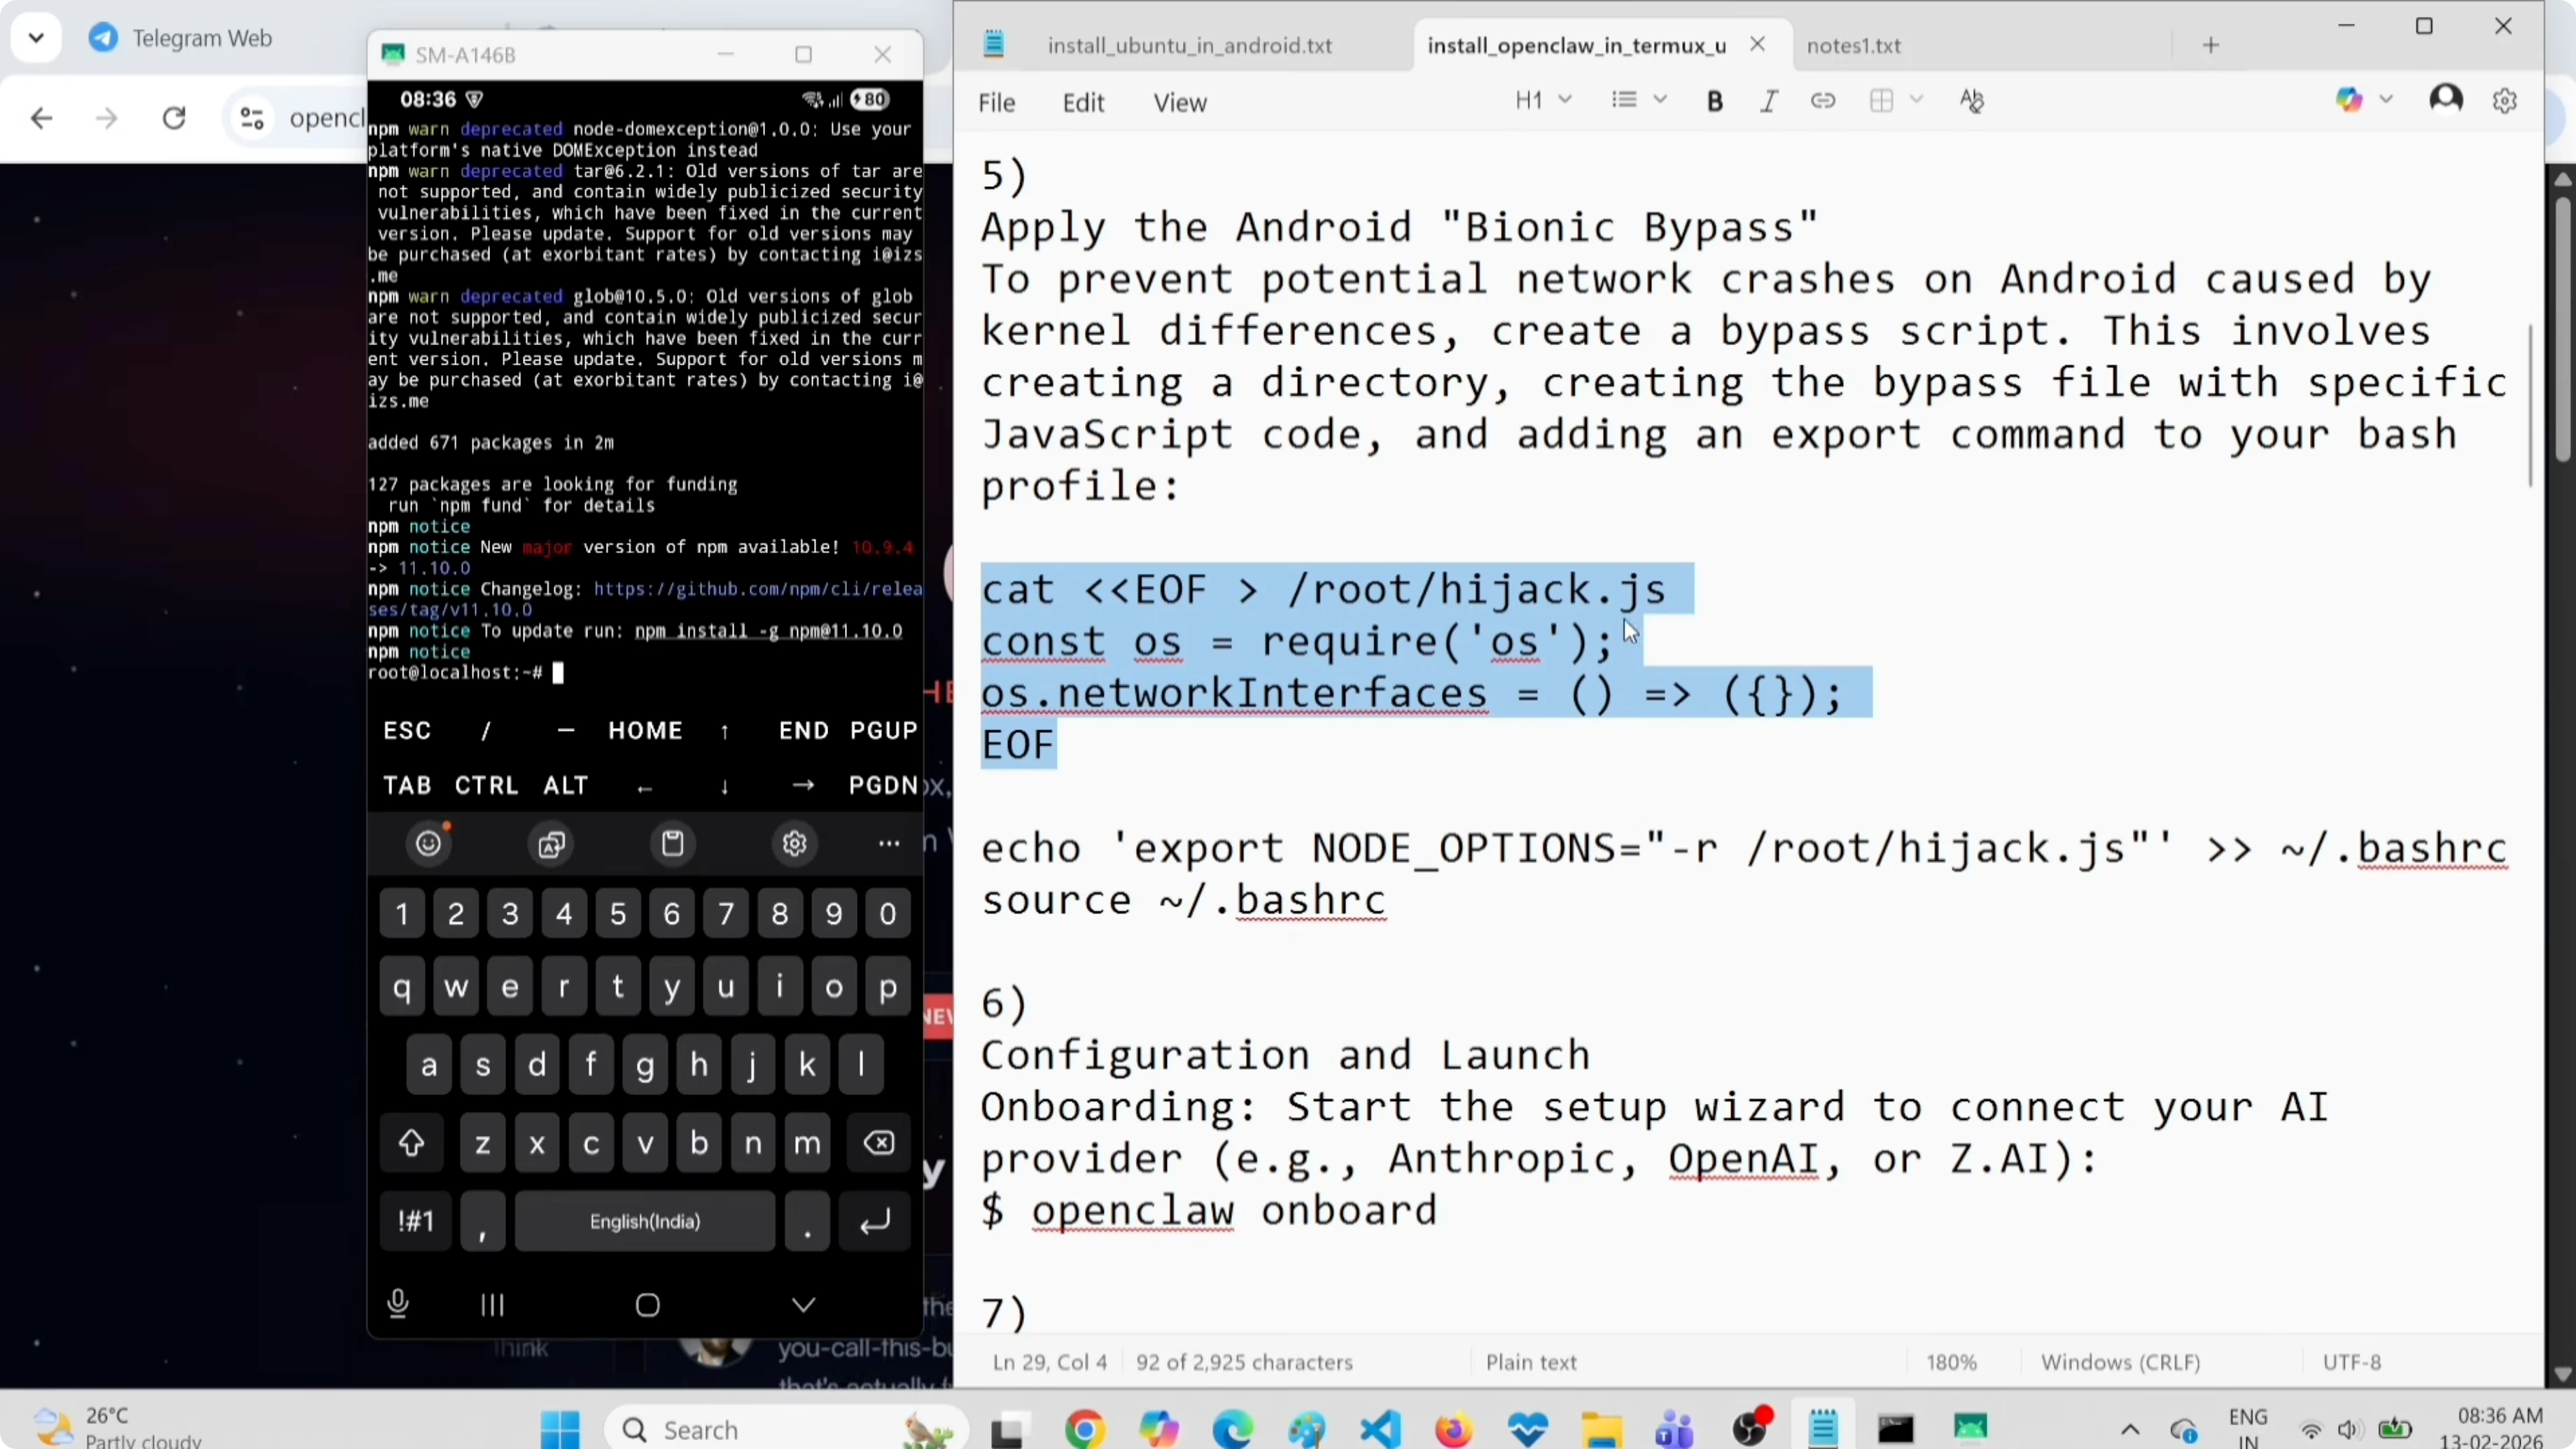
Fix bionic kernel crash
Before running OpenClaw, we need to fix a bionic kernel bug that can cause crashes. We'll create a small JavaScript shim that Node loads automatically at startup.
Create the hijack.js file in your home directory:
nano ~/hijack.jsPaste this code (it's a minimal workaround to avoid the crash related to os.cpus()):
/* Minimal shim to avoid potential bionic crash */
try {
  const os = require('os');
  if (typeof os.cpus === 'function') {
    const one = (Array.isArray(os.cpus()) && os.cpus()[0]) || { model: 'unknown', speed: 0, times: {} };
    os.cpus = () => [one];
  }
} catch {}
Save with Ctrl+O, Enter, and exit with Ctrl+X. Now add the NODE_OPTIONS variable to your .bashrc:
echo 'export NODE_OPTIONS="--require=$HOME/hijack.js"' >> ~/.bashrc
source ~/.bashrc
This ensures Node loads the shim automatically for all processes.
Check out my projects
Take a look at the projects I am working on and the technologies I use.
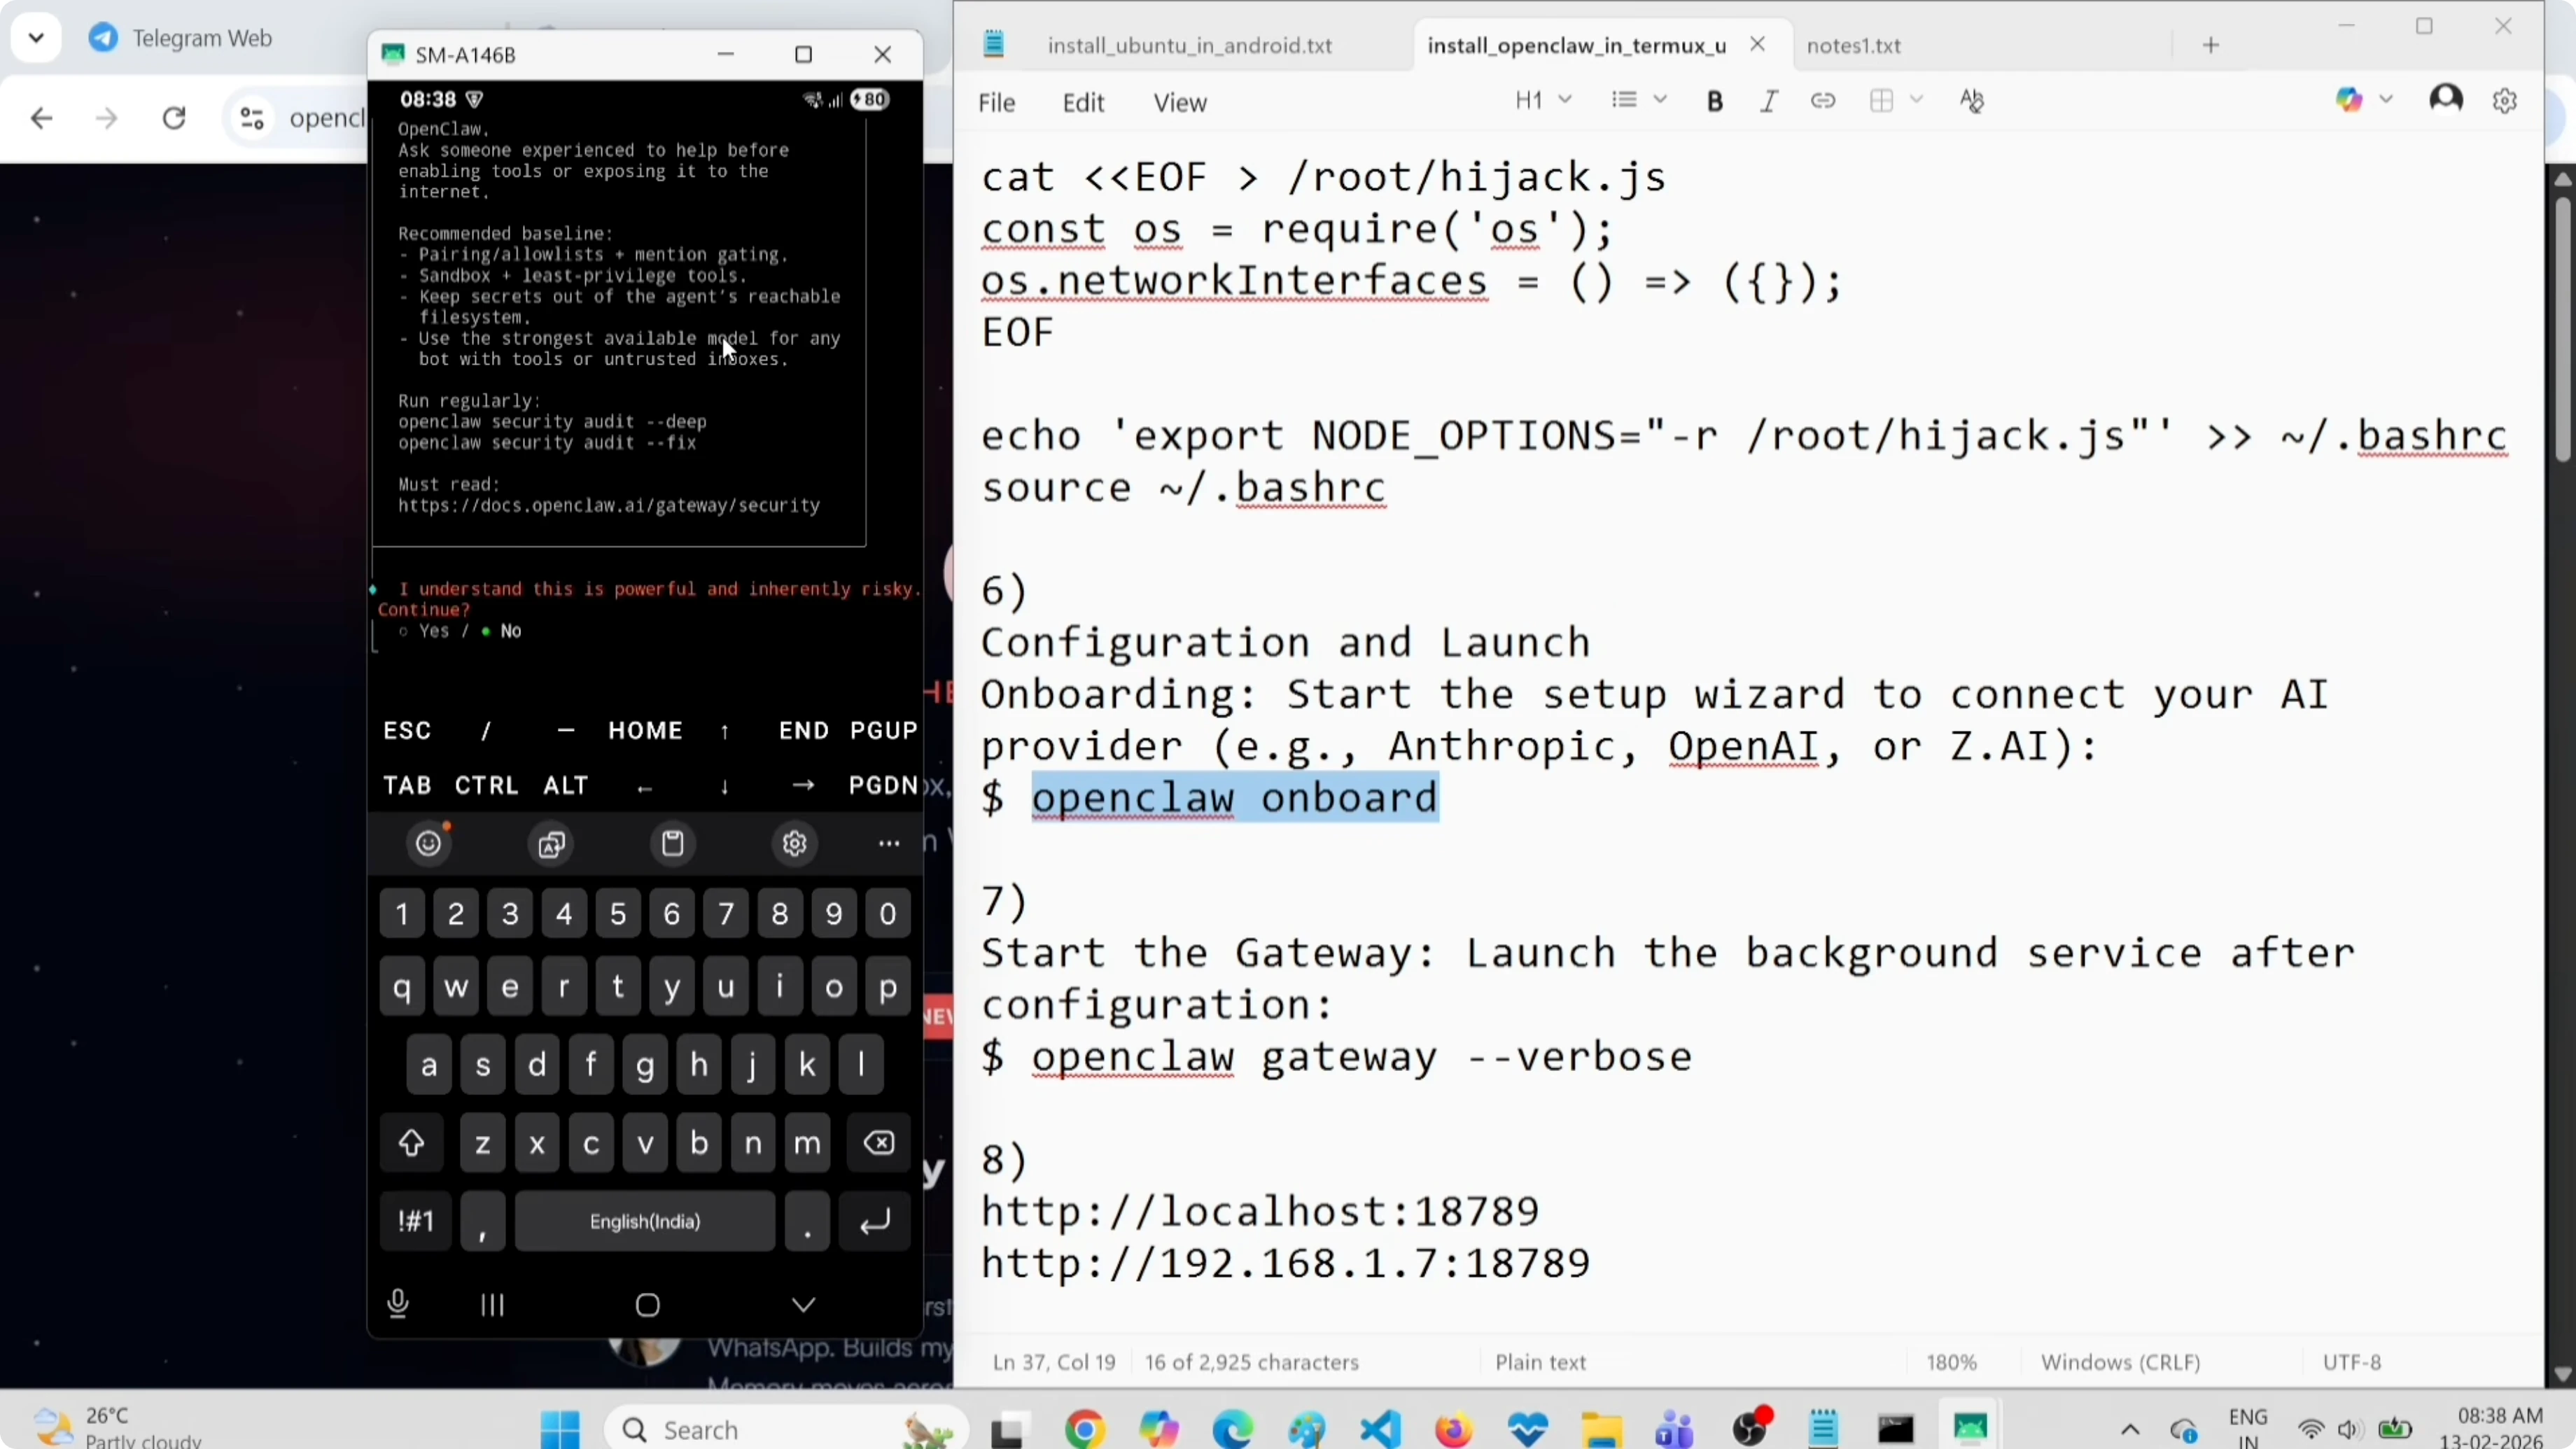
Configure OpenClaw
Start OpenClaw onboarding to configure the provider, model, and Telegram channel:
openclaw onboardSelect "Yes" when prompted and choose "Quick Start". When asked for the API provider, select OpenRouter and paste your OpenRouter API key (find it in your account settings on openrouter.ai).
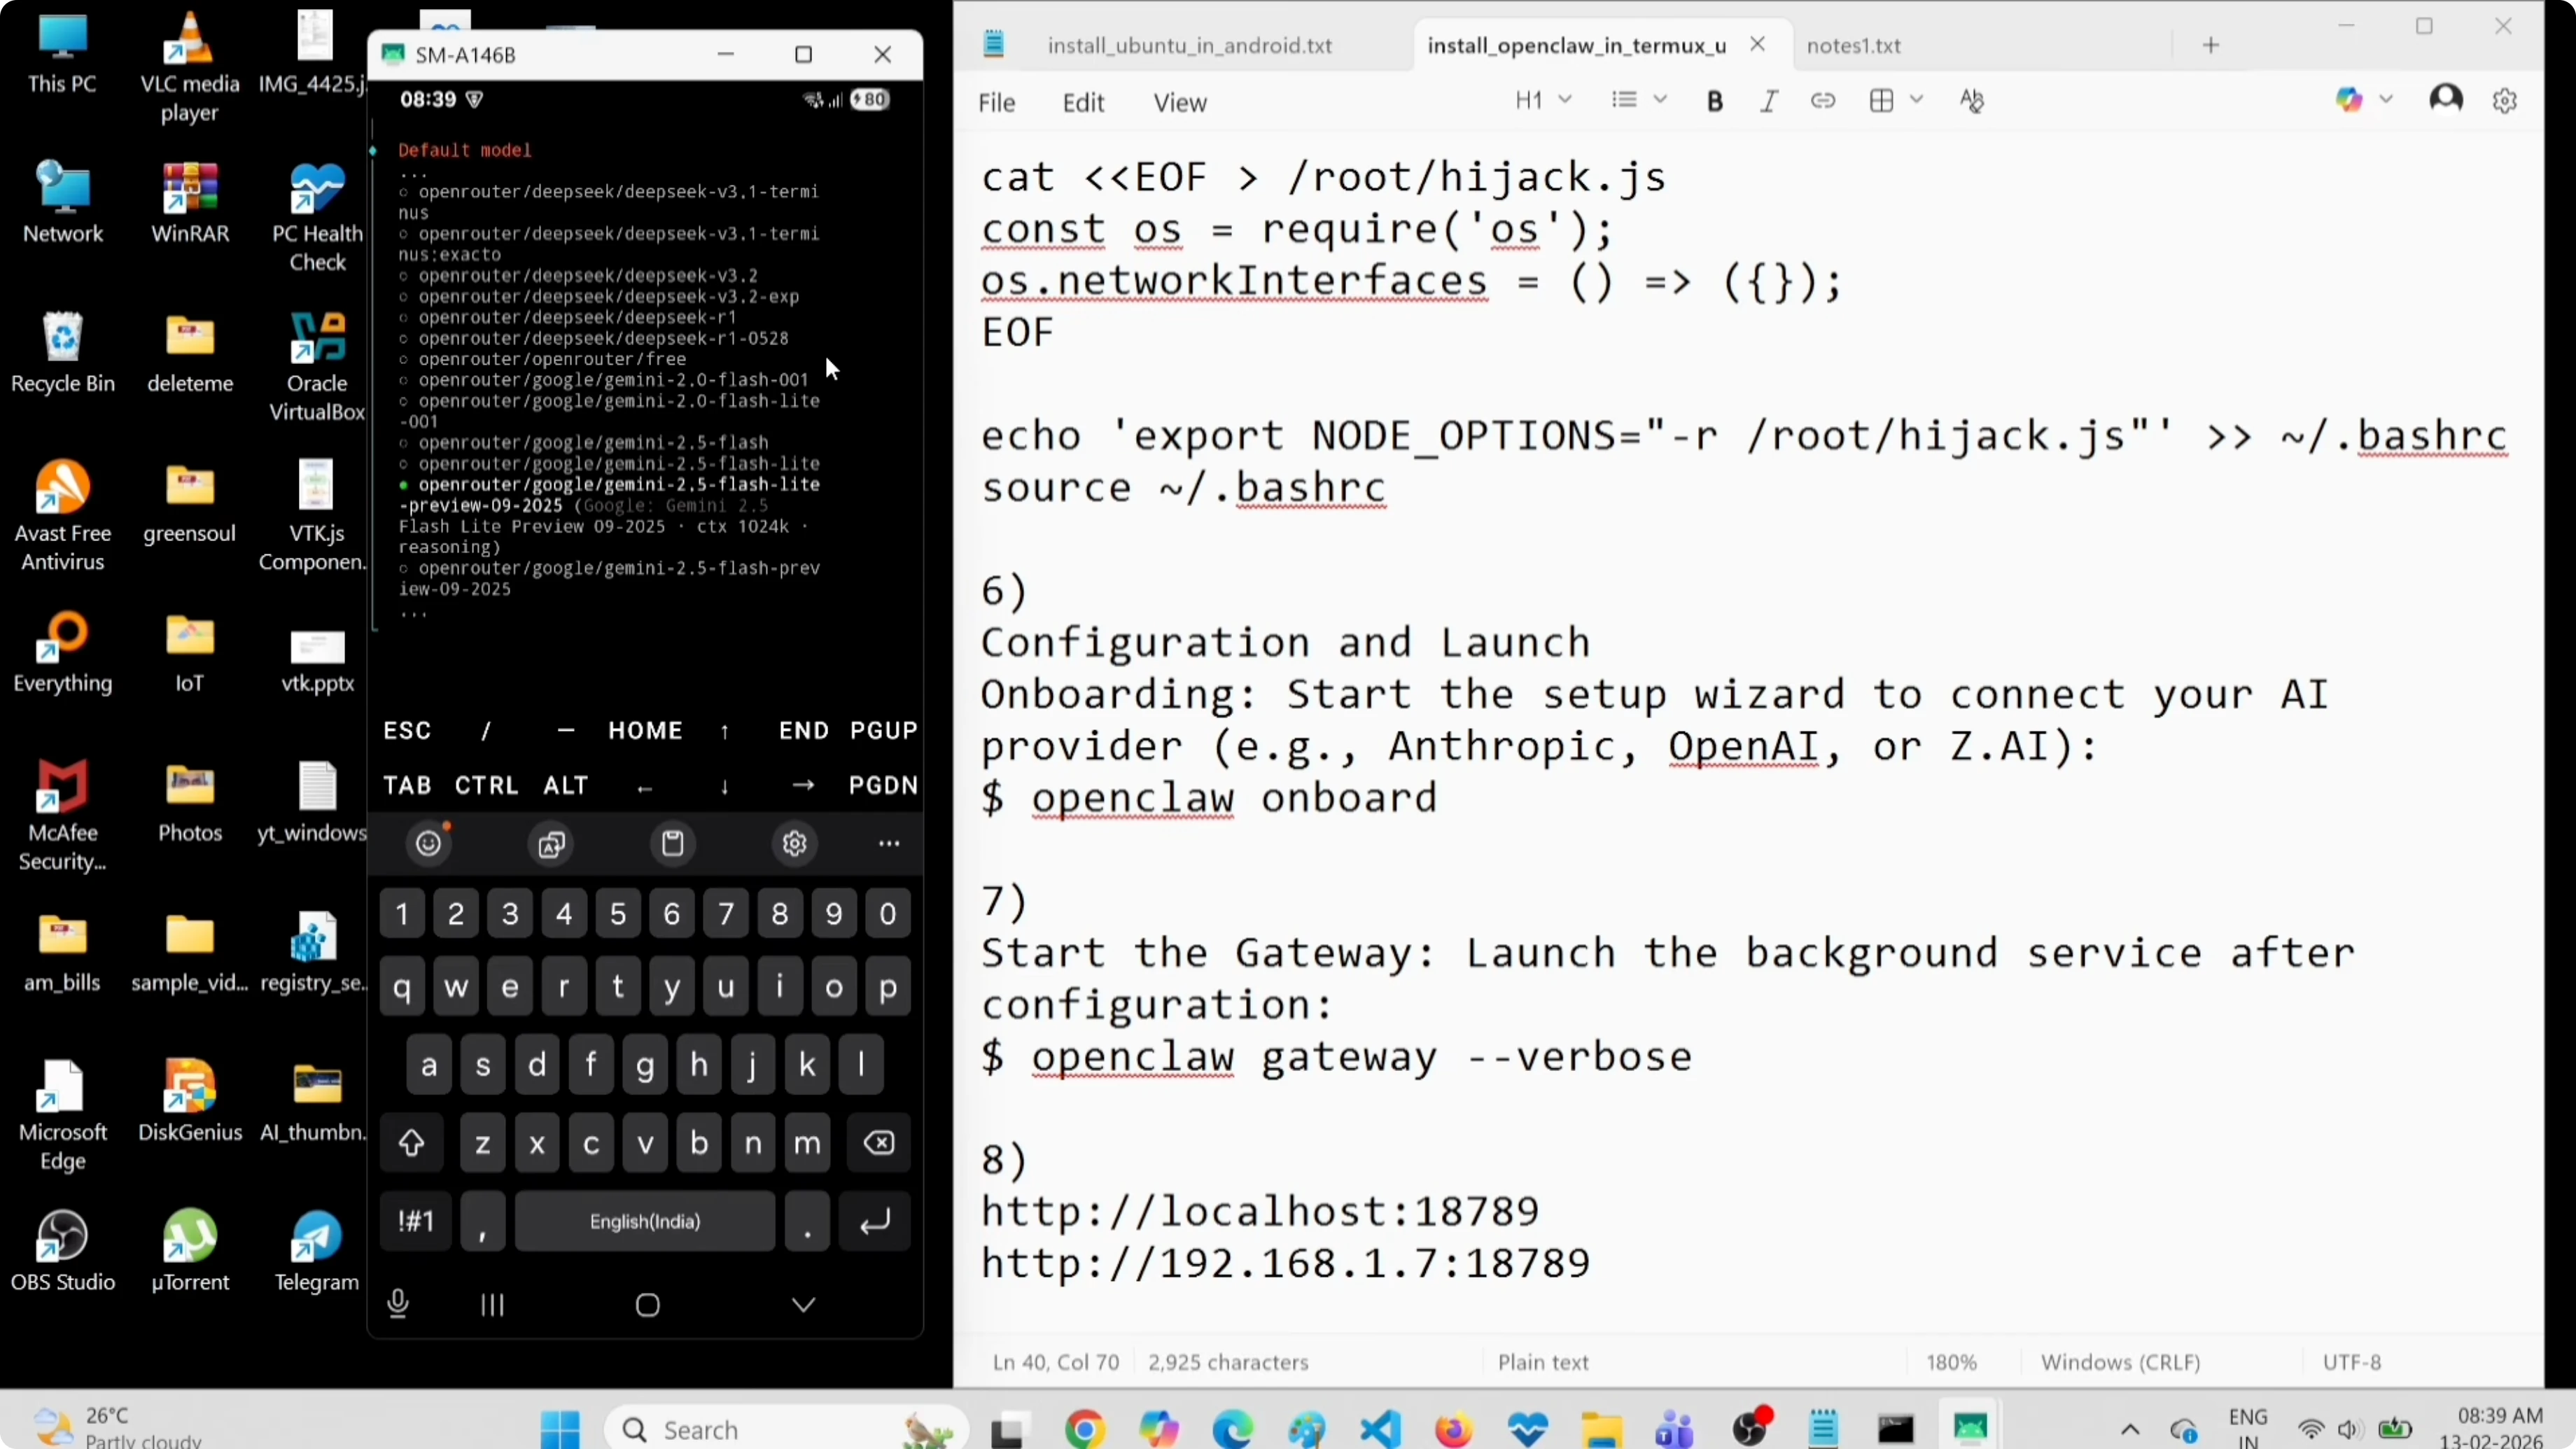
Choose a free model
To avoid costs, choose a free model. When prompted for the model, select:
openrouter/google/gemini-flash-1.5-preview
This model is free and works well for most tasks. You can change models later by editing the config file.
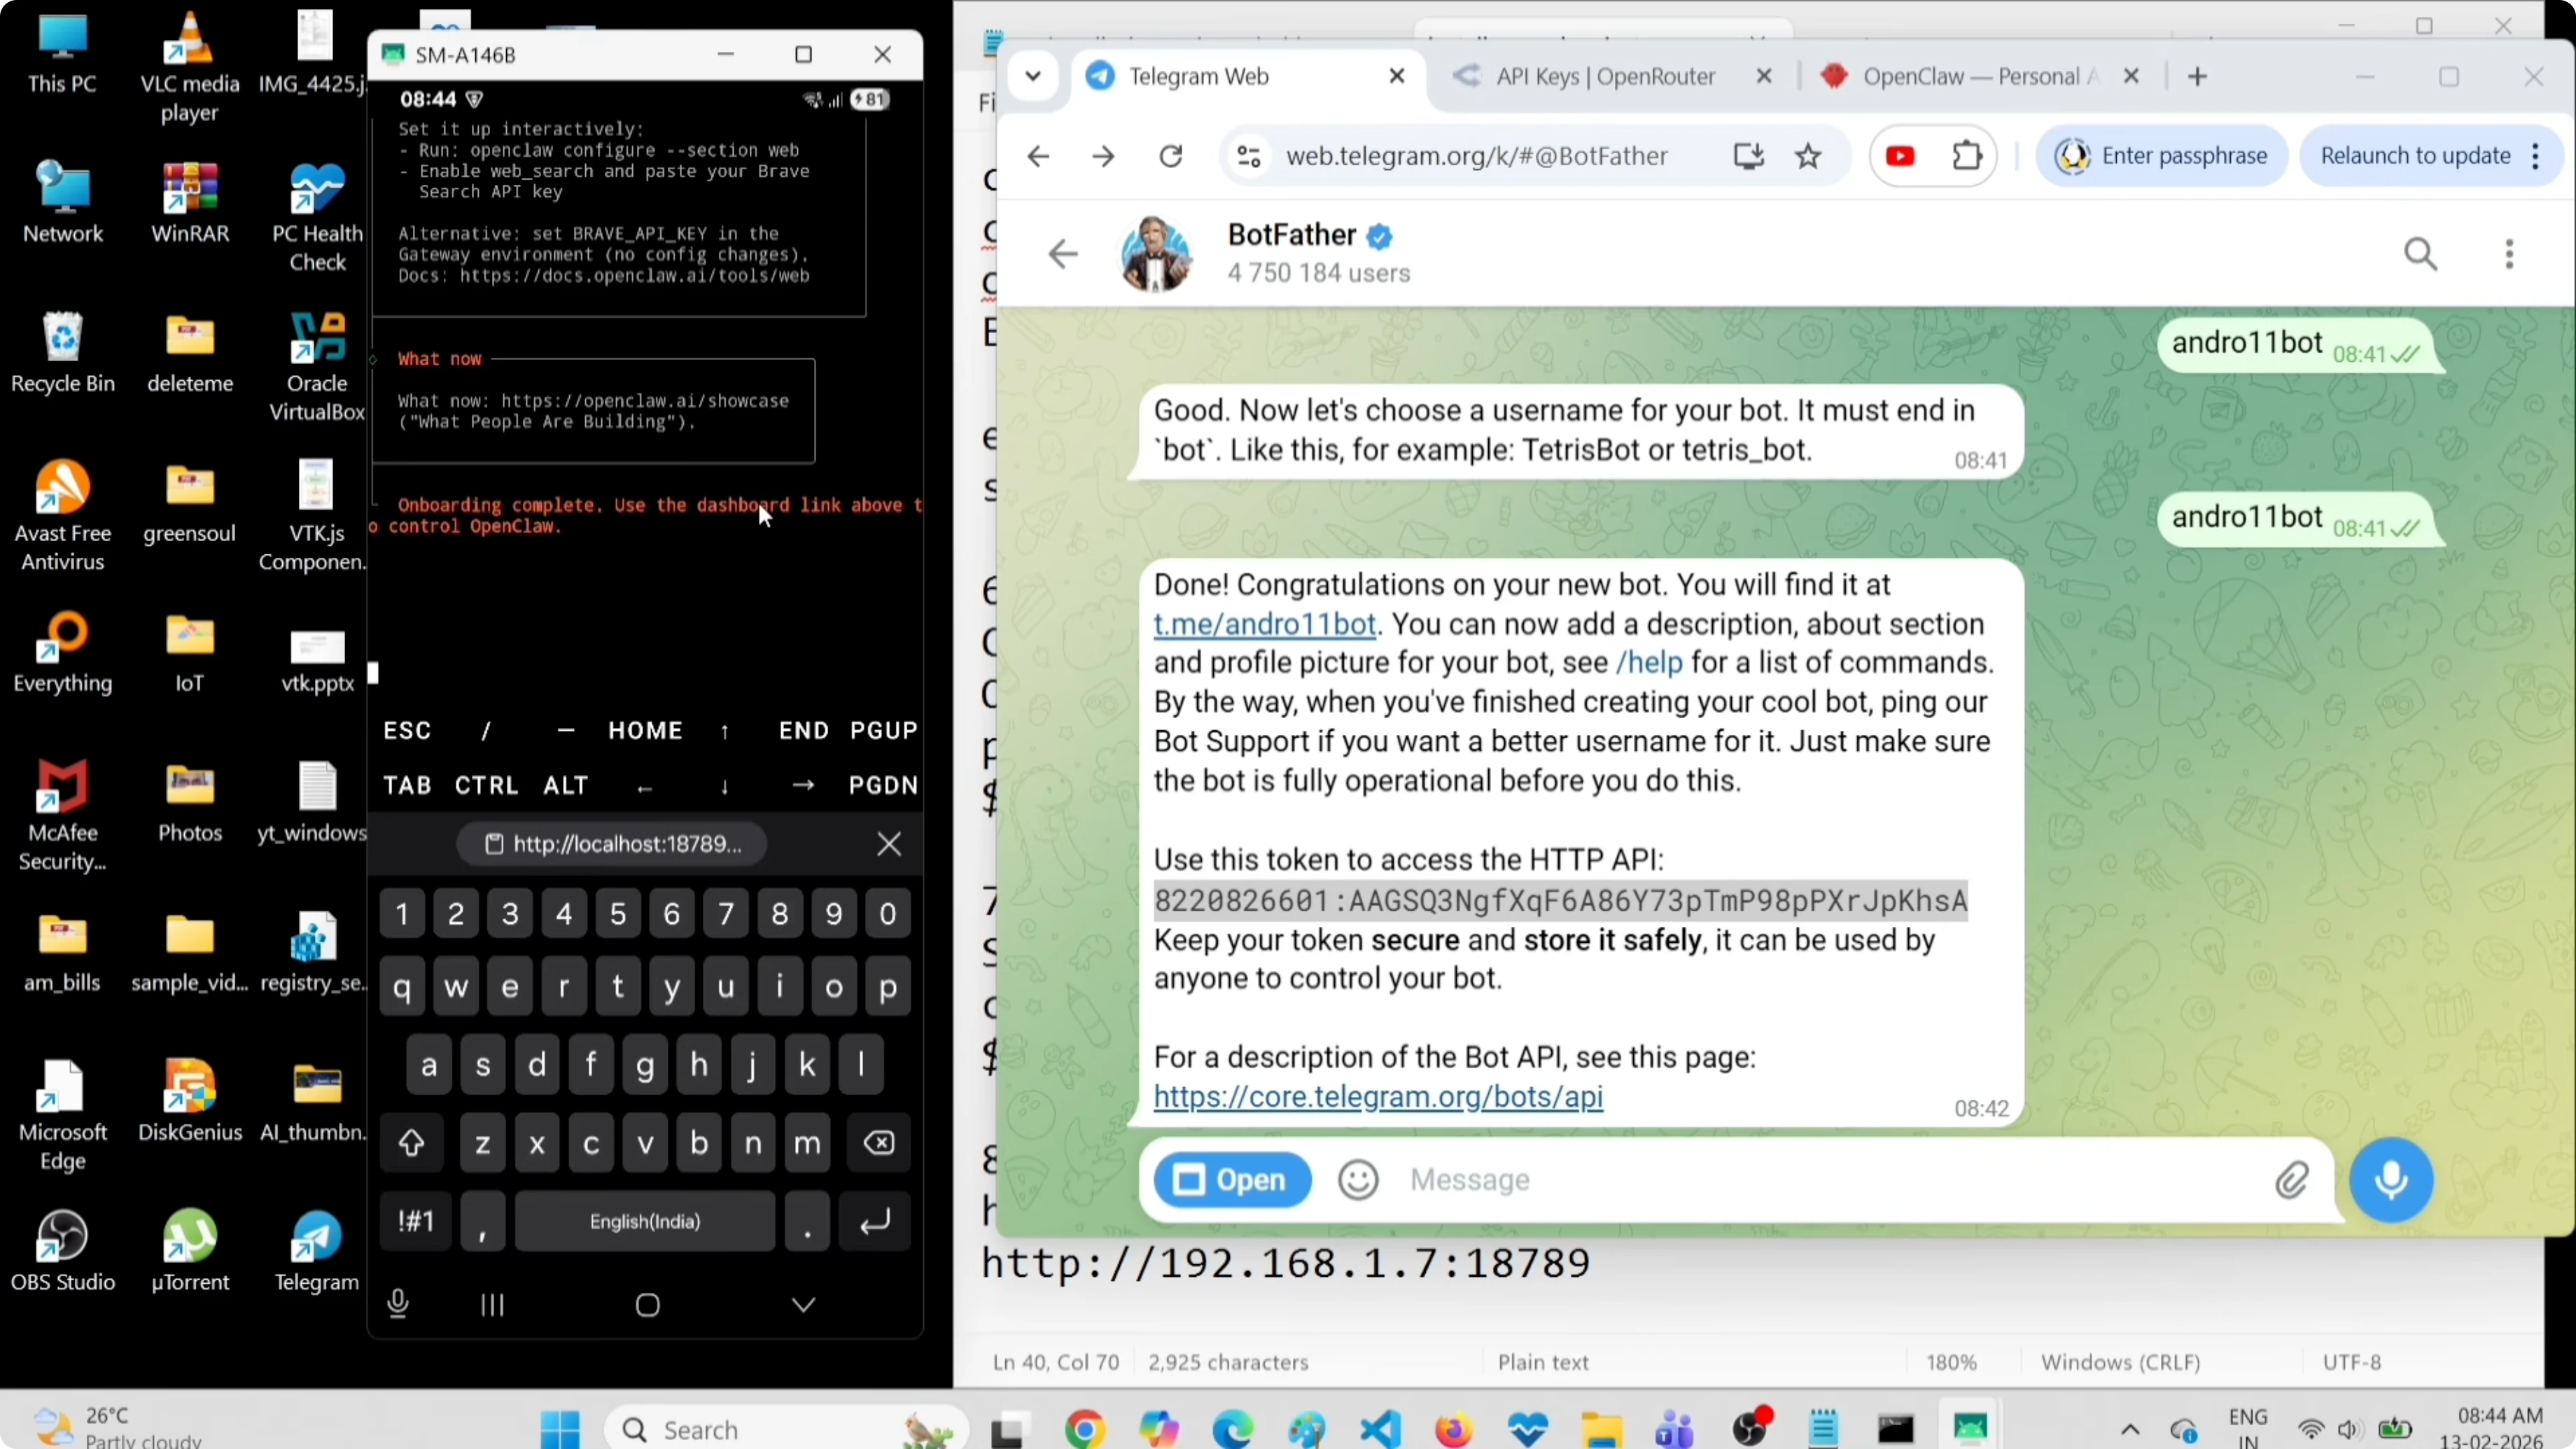
Configure Telegram
To connect Telegram, you need to create a bot. Open Telegram, search for BotFather, and start a chat. Send /newbot, choose a name for your bot, and then a unique username (must end with "bot"). BotFather will give you a token.
Copy the token and paste it when OpenClaw asks for it during onboarding. When asked if you want to install skills, you can skip for now. Onboarding completes and shows you the local URL for the OpenClaw Gateway dashboard.
Want AI automation help?
I offer personalized consulting to integrate AI into your workflow or project.
Start the gateway and open the dashboard
At this point, the dashboard won't load yet because the gateway isn't running. Exit the onboarding screen with Ctrl+C if needed and start the gateway in verbose mode:
openclaw gateway --verboseOpen your phone's browser and navigate to:
http://localhost:18789
You'll likely see a "Disconnected" status. Let's fix that now.
Fix the disconnected status
Open a new Termux session (swipe from the left or use the drawer) and log into Ubuntu again. We'll read the OpenClaw config file to get the gateway token:
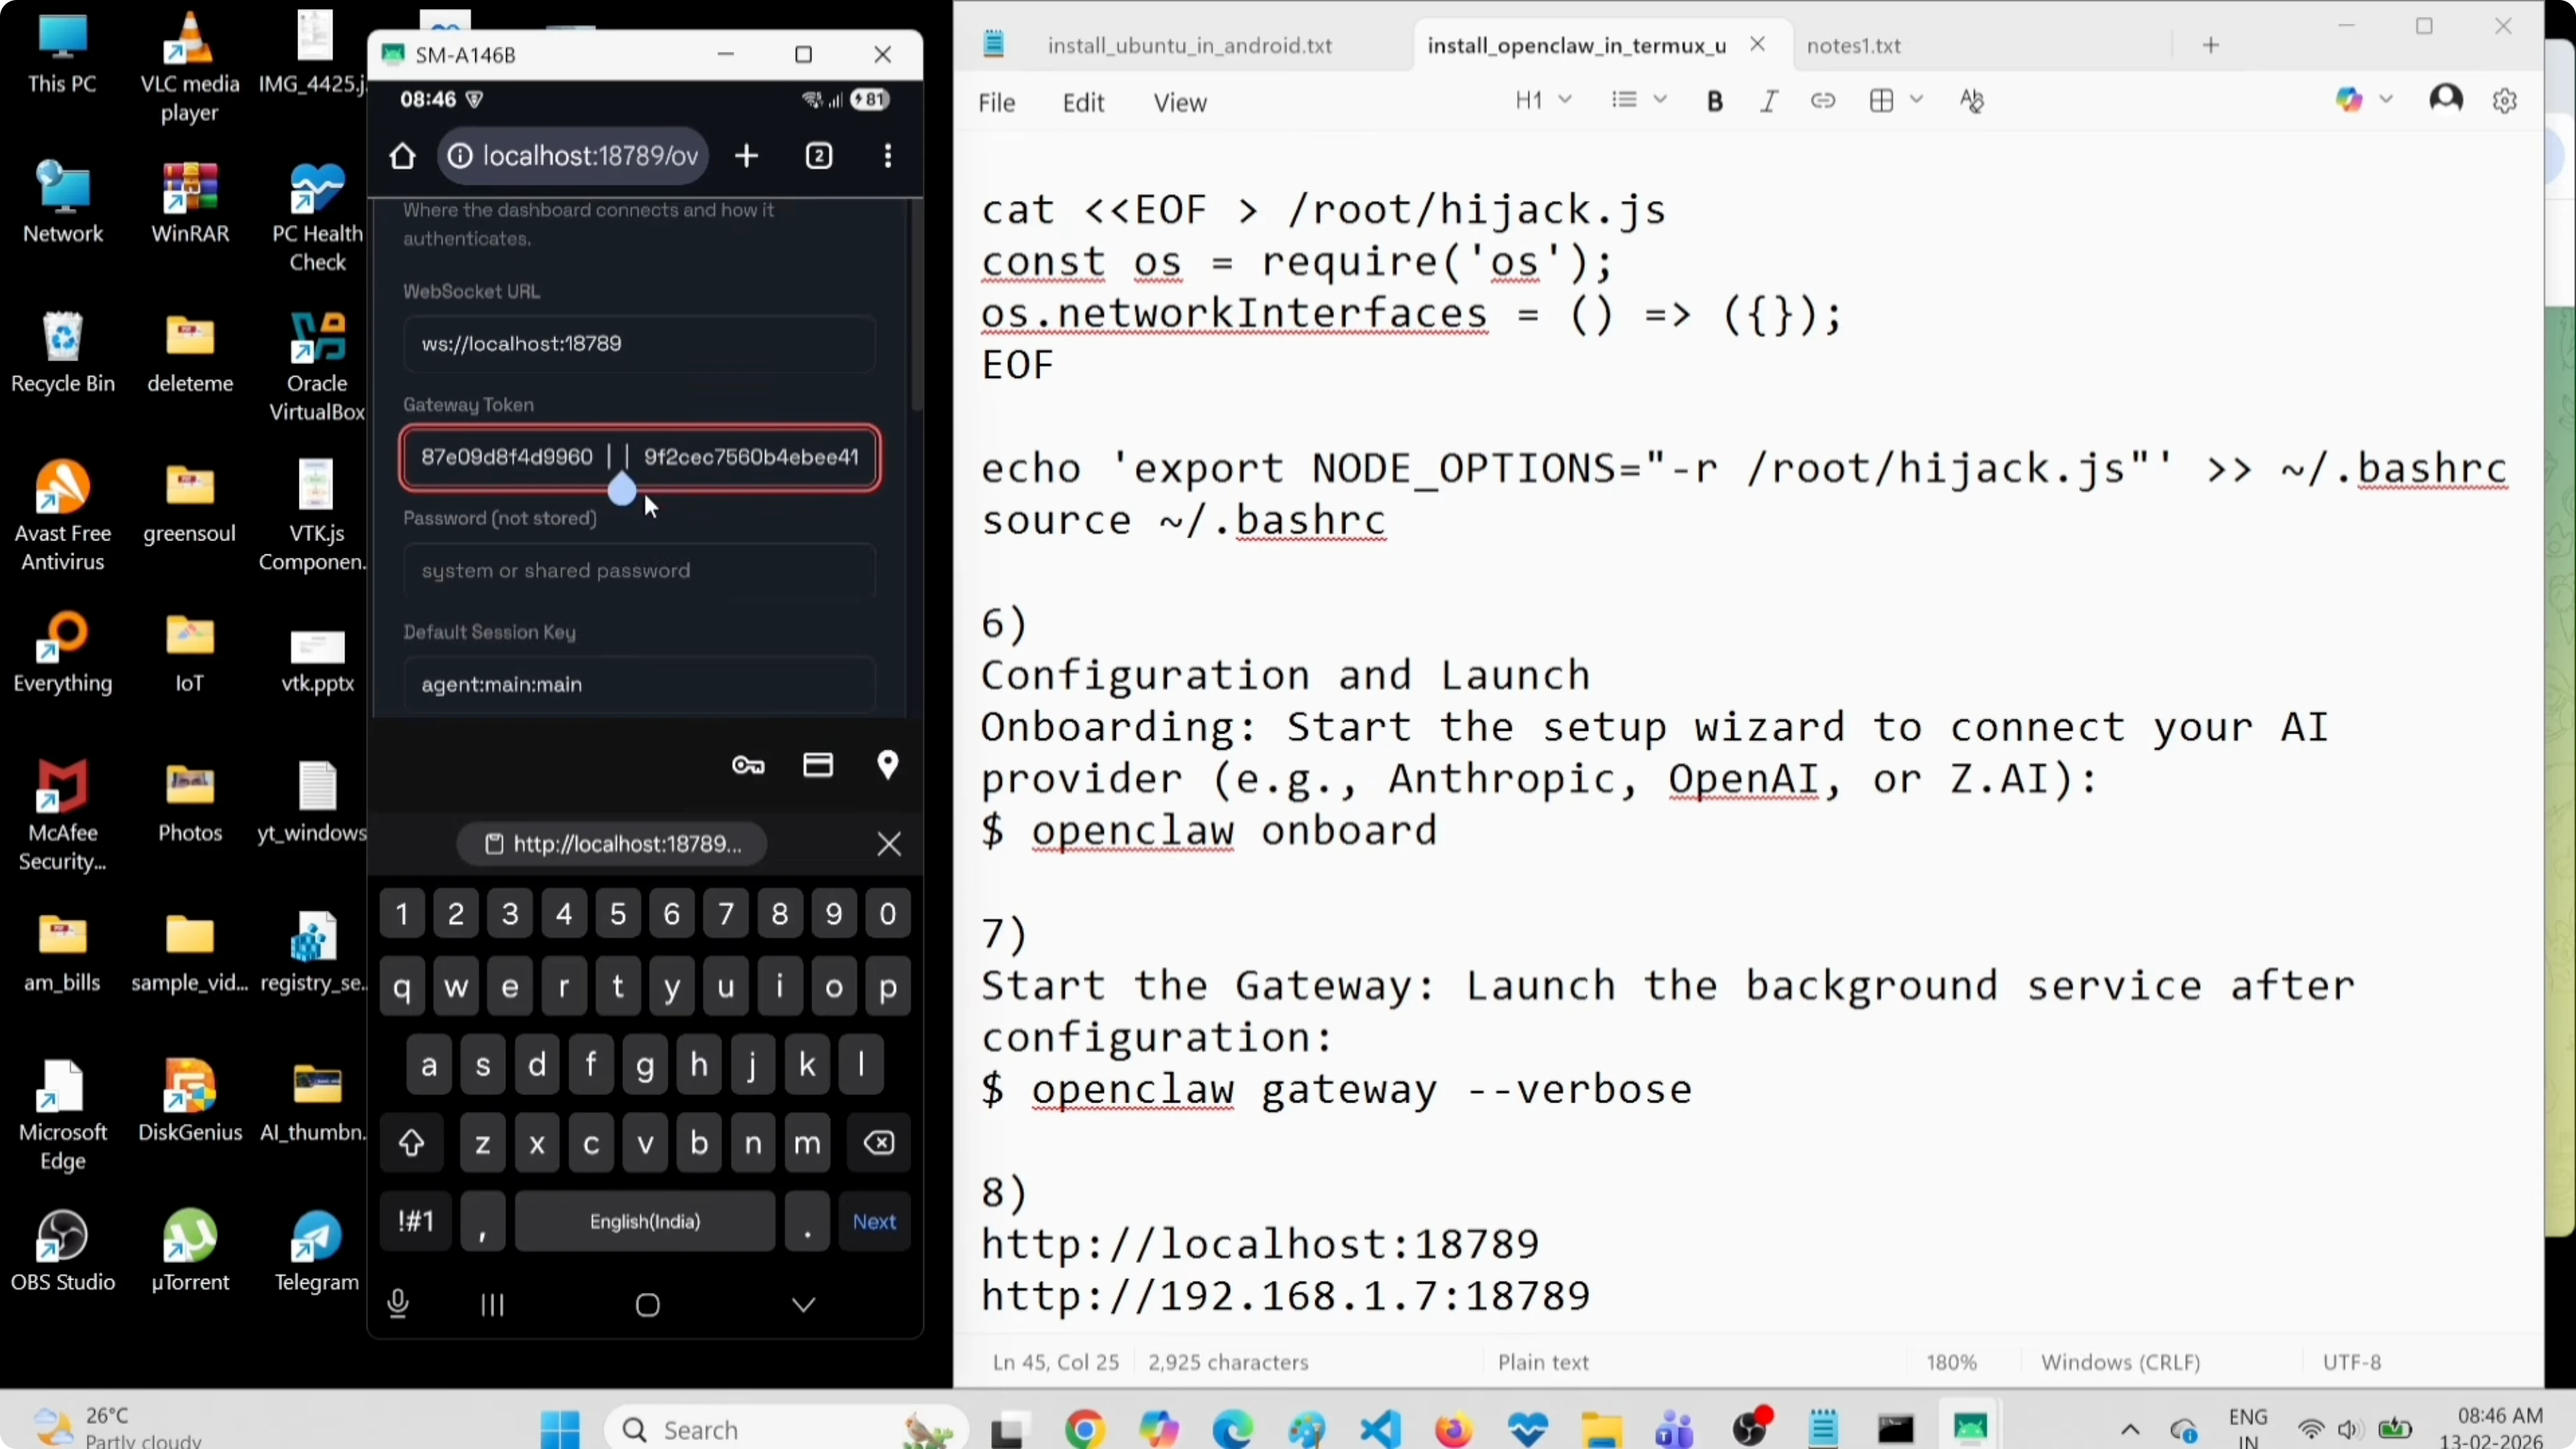
proot-distro login ubuntu
cat ~/.openclaw/openclaw.json
Look for the gateway section and copy the token string. Paste it into the token field on the dashboard (in the Overview section), remove any quotes, and click "Connect". The status will change to "Connected".
Test chat and Telegram
Go to the "Chat" tab in the dashboard and send a prompt. I test with something simple like "hello, tell me an interesting fact" and wait for the response to confirm the model works.
Now test Telegram. Open the bot you created in Telegram and press "Start". The bot will show you a pairing command. Copy it, paste it into the Ubuntu terminal, and approve the pairing. After approval, send a prompt in Telegram and verify that the response appears both in Telegram and in the OpenClaw dashboard.
Explore more AI tutorials
Read more articles about OpenClaw, AI agents, and intelligent automation.
Final thoughts
We installed Termux on Android, added Ubuntu with proot-distro, updated essential packages, installed Node.js with a workaround for the bionic kernel, installed OpenClaw, and completed onboarding with OpenRouter and the free Gemini Flash model. We connected Telegram, started the gateway, fixed the token issue, and verified that prompts work from both the dashboard and Telegram.
You now have a complete AI agent on your phone at zero cost for the model and no need for an external server. You can use it for automation, personal assistance, or as a foundation for experiments with custom skills. If you later want to move to local models with Ollama, this setup is ready to accommodate that configuration.
What to do next:
- Explore available skills with
openclaw skills list - Configure other channels (Signal, Discord, WhatsApp)
- Switch to a more powerful model when needed (Claude, GPT-4o, etc.)
- Create your own custom skills for specific tasks
OpenClaw on Android is slower than a dedicated server, but it's perfect for having an AI assistant always with you, completely under your control.
