You can run OpenClaw without spending a dime. I set it up with a free OpenRouter API key, the Gemini 2.5 Flash model (free), and a Telegram bot. Everything works end-to-end, tested and confirmed.
This is the complete procedure - from installation to your first Telegram test. Zero cost, zero artificial limits (at least for experimentation).
Install and Start Onboarding
After installing OpenClaw on your system, launch the onboarding wizard:
openclaw onboard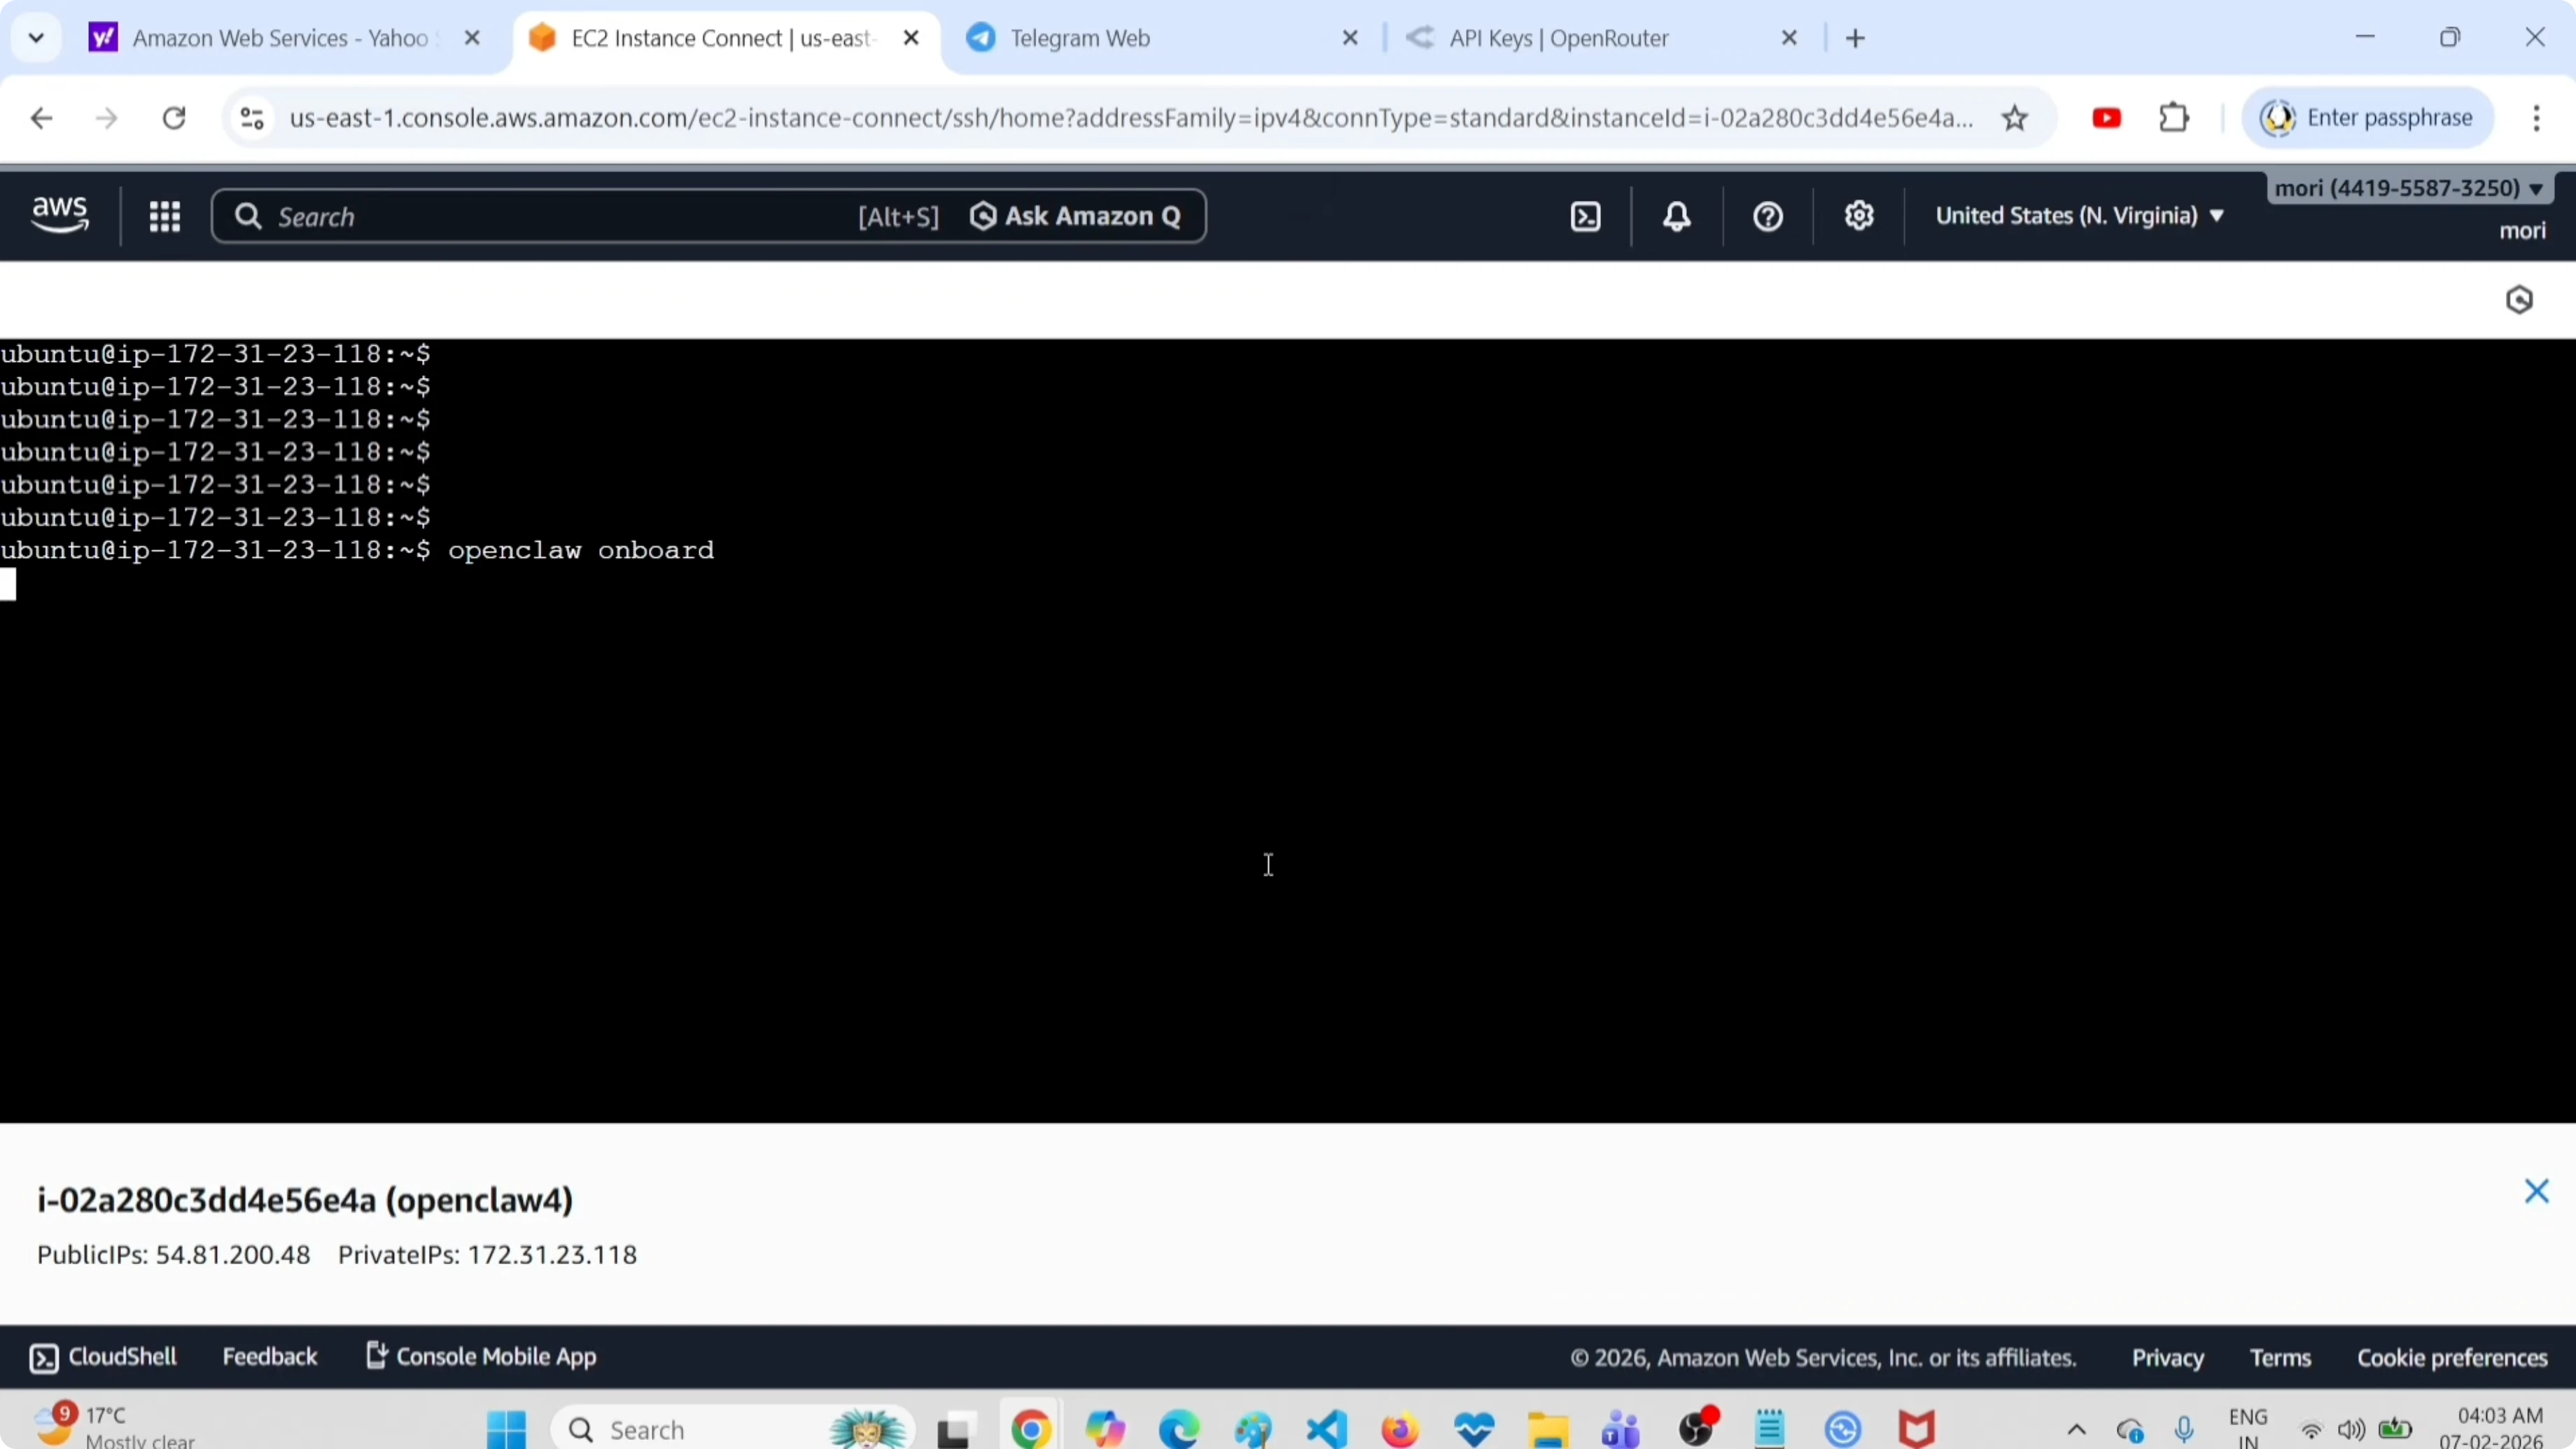
The wizard asks if you want to start setup. Answer Yes. Select Quick Start for a simplified path.
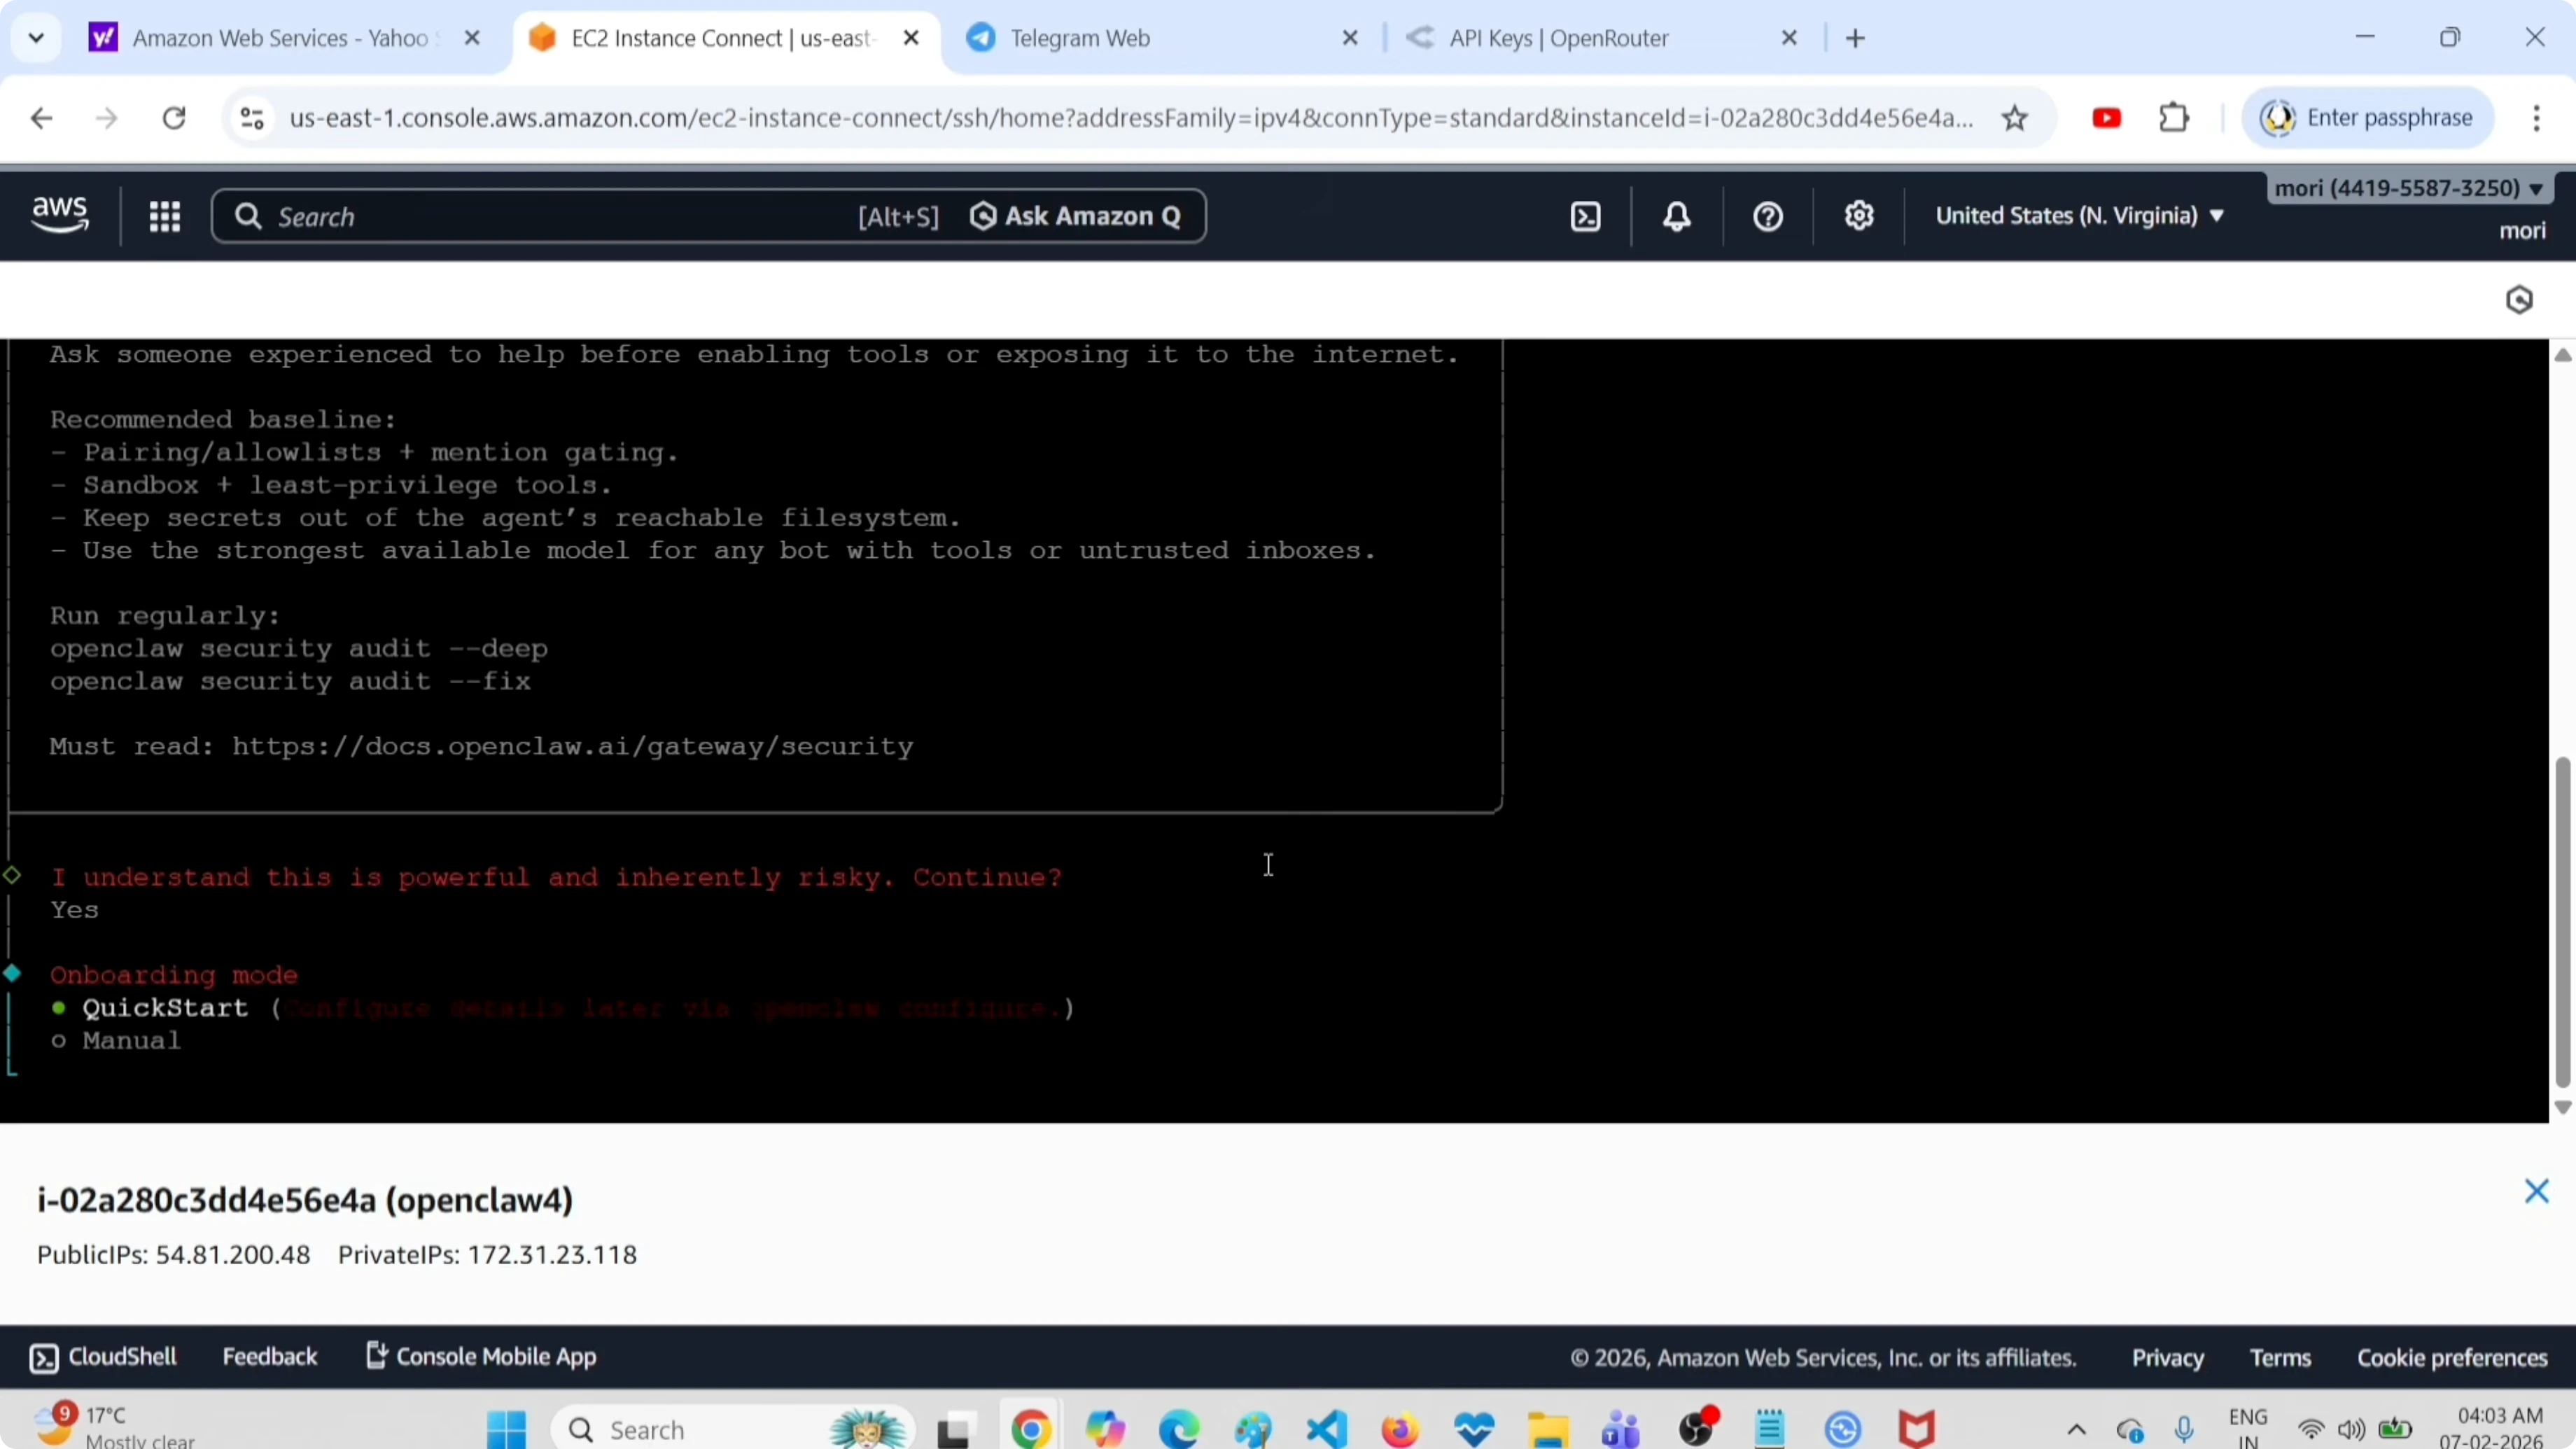
Quick Start skips advanced configurations and gets you straight to the point.
Configure Provider and Free API Key
The wizard asks which provider you want to use. Select OpenRouter.
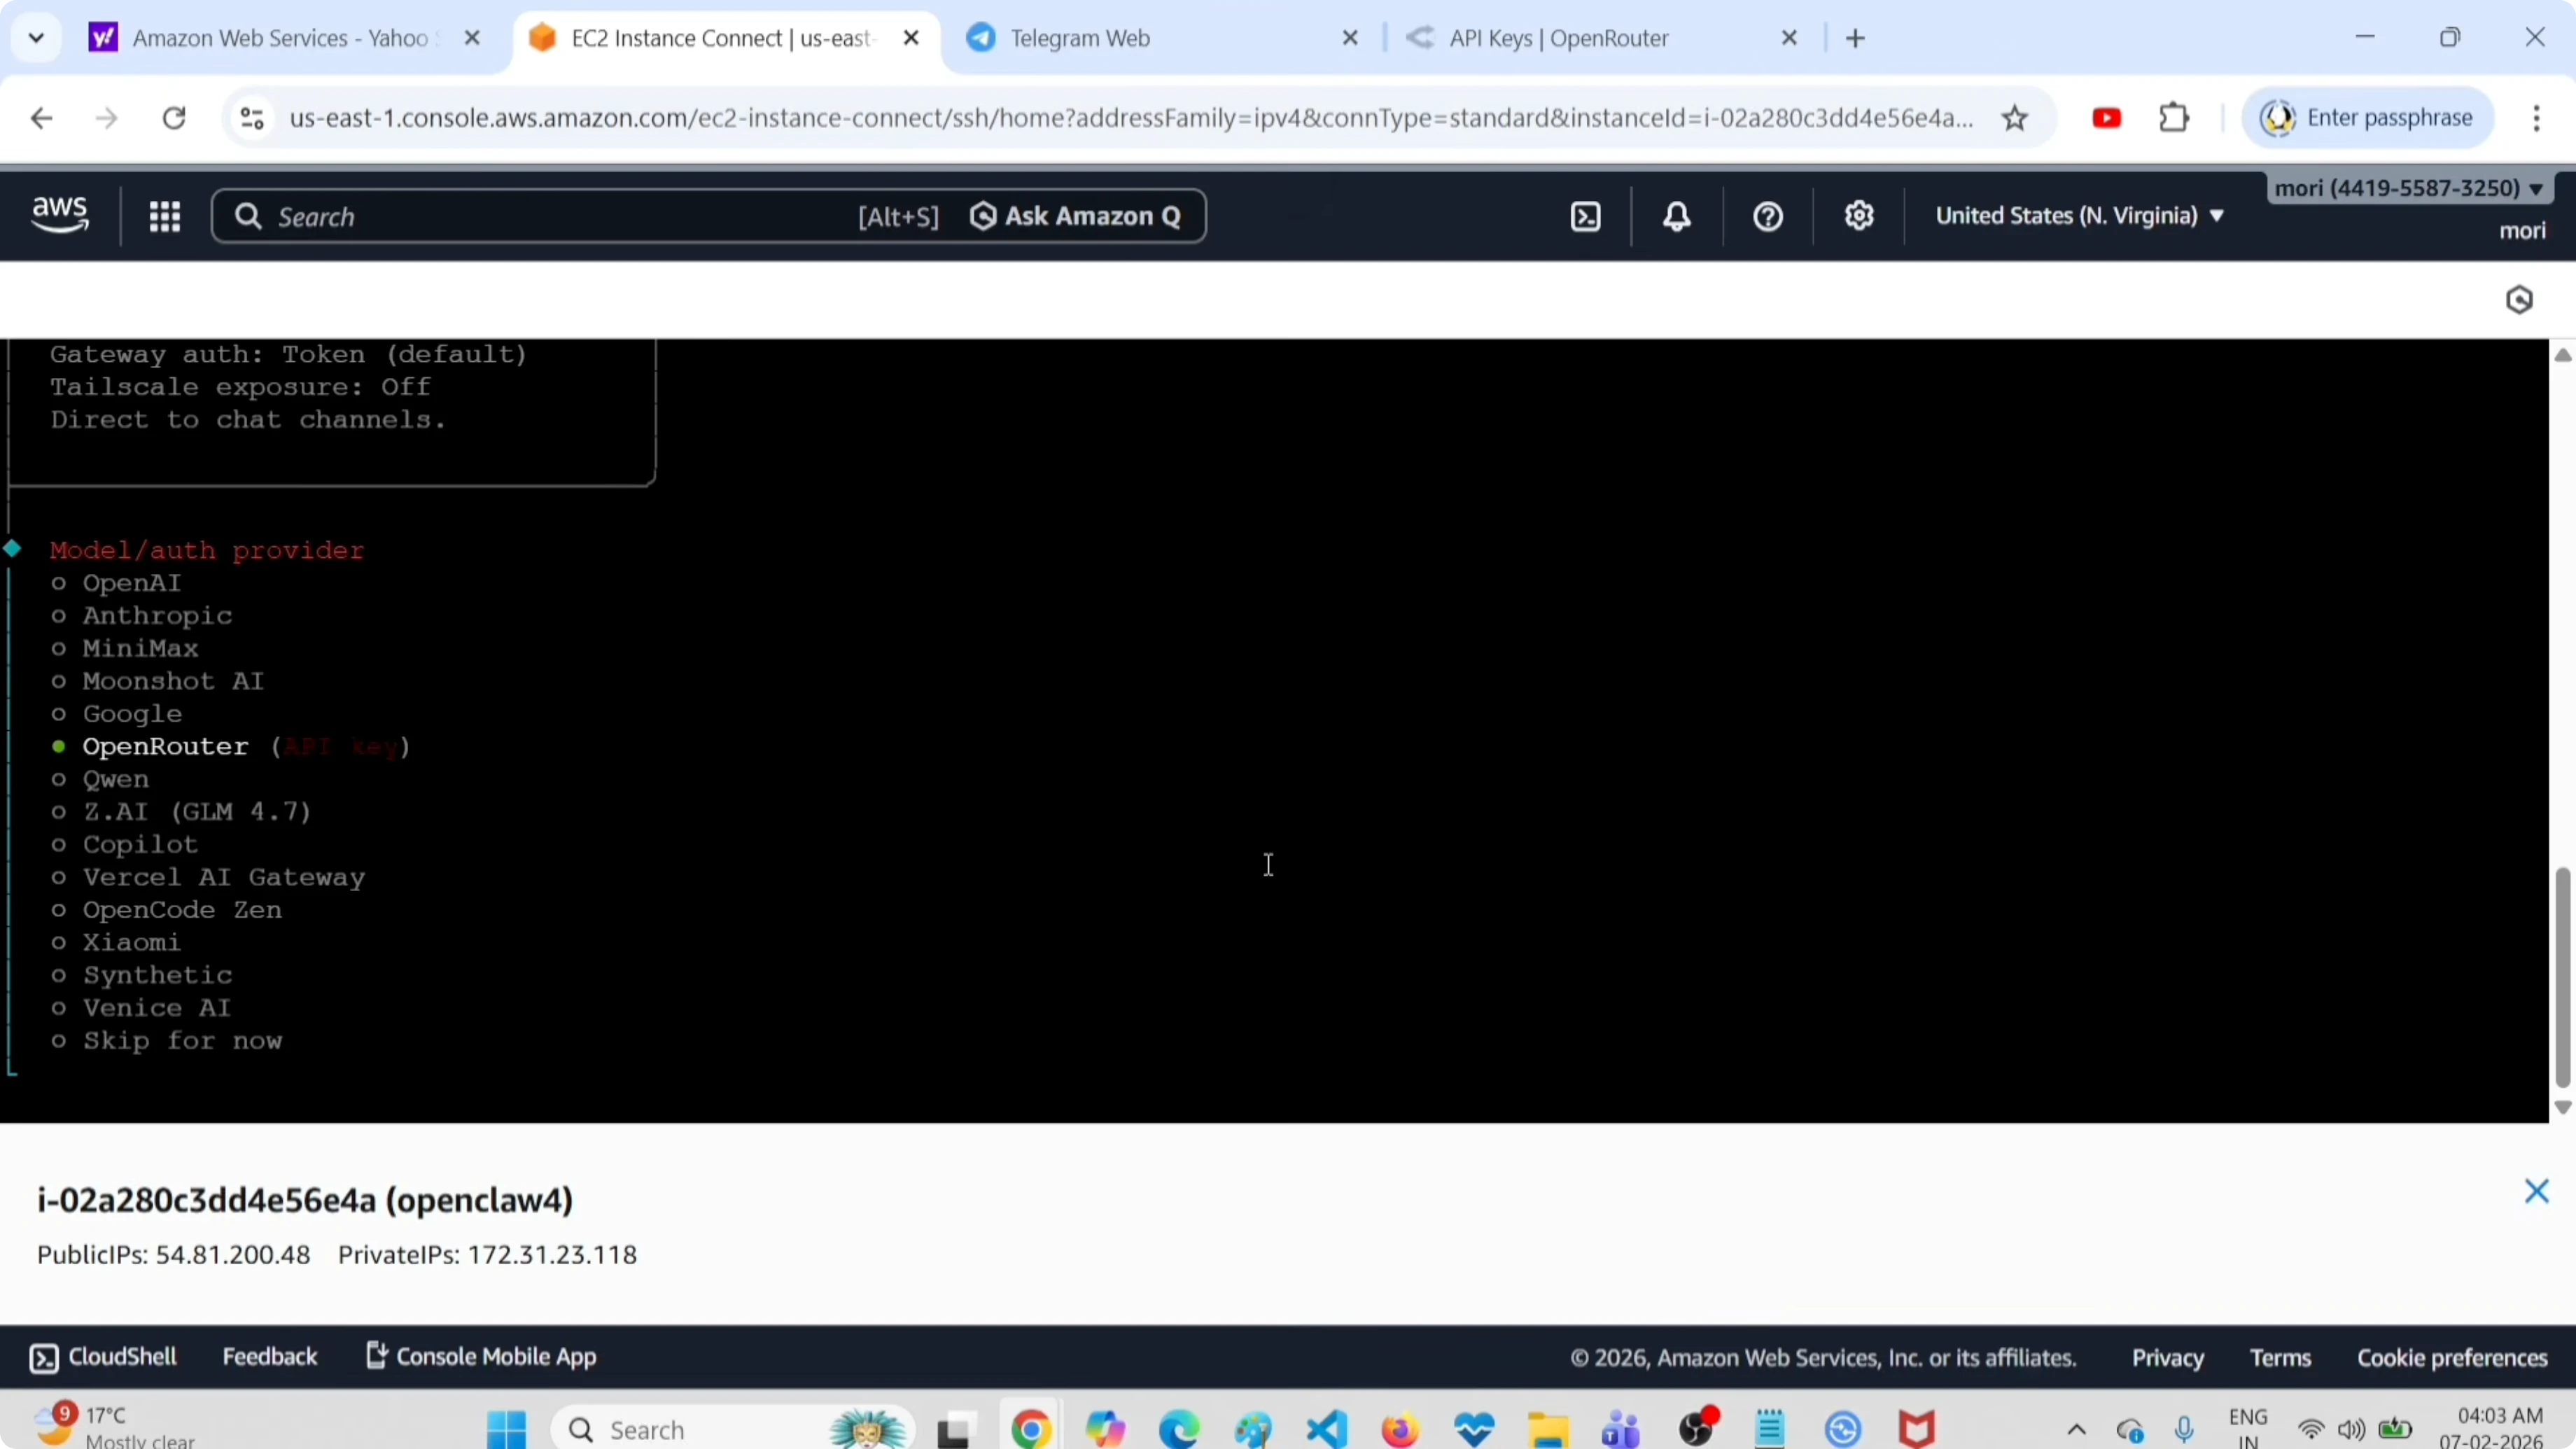
Now you need an API key. Go to https://openrouter.ai/settings/keys, click Create API Key and generate a free key.
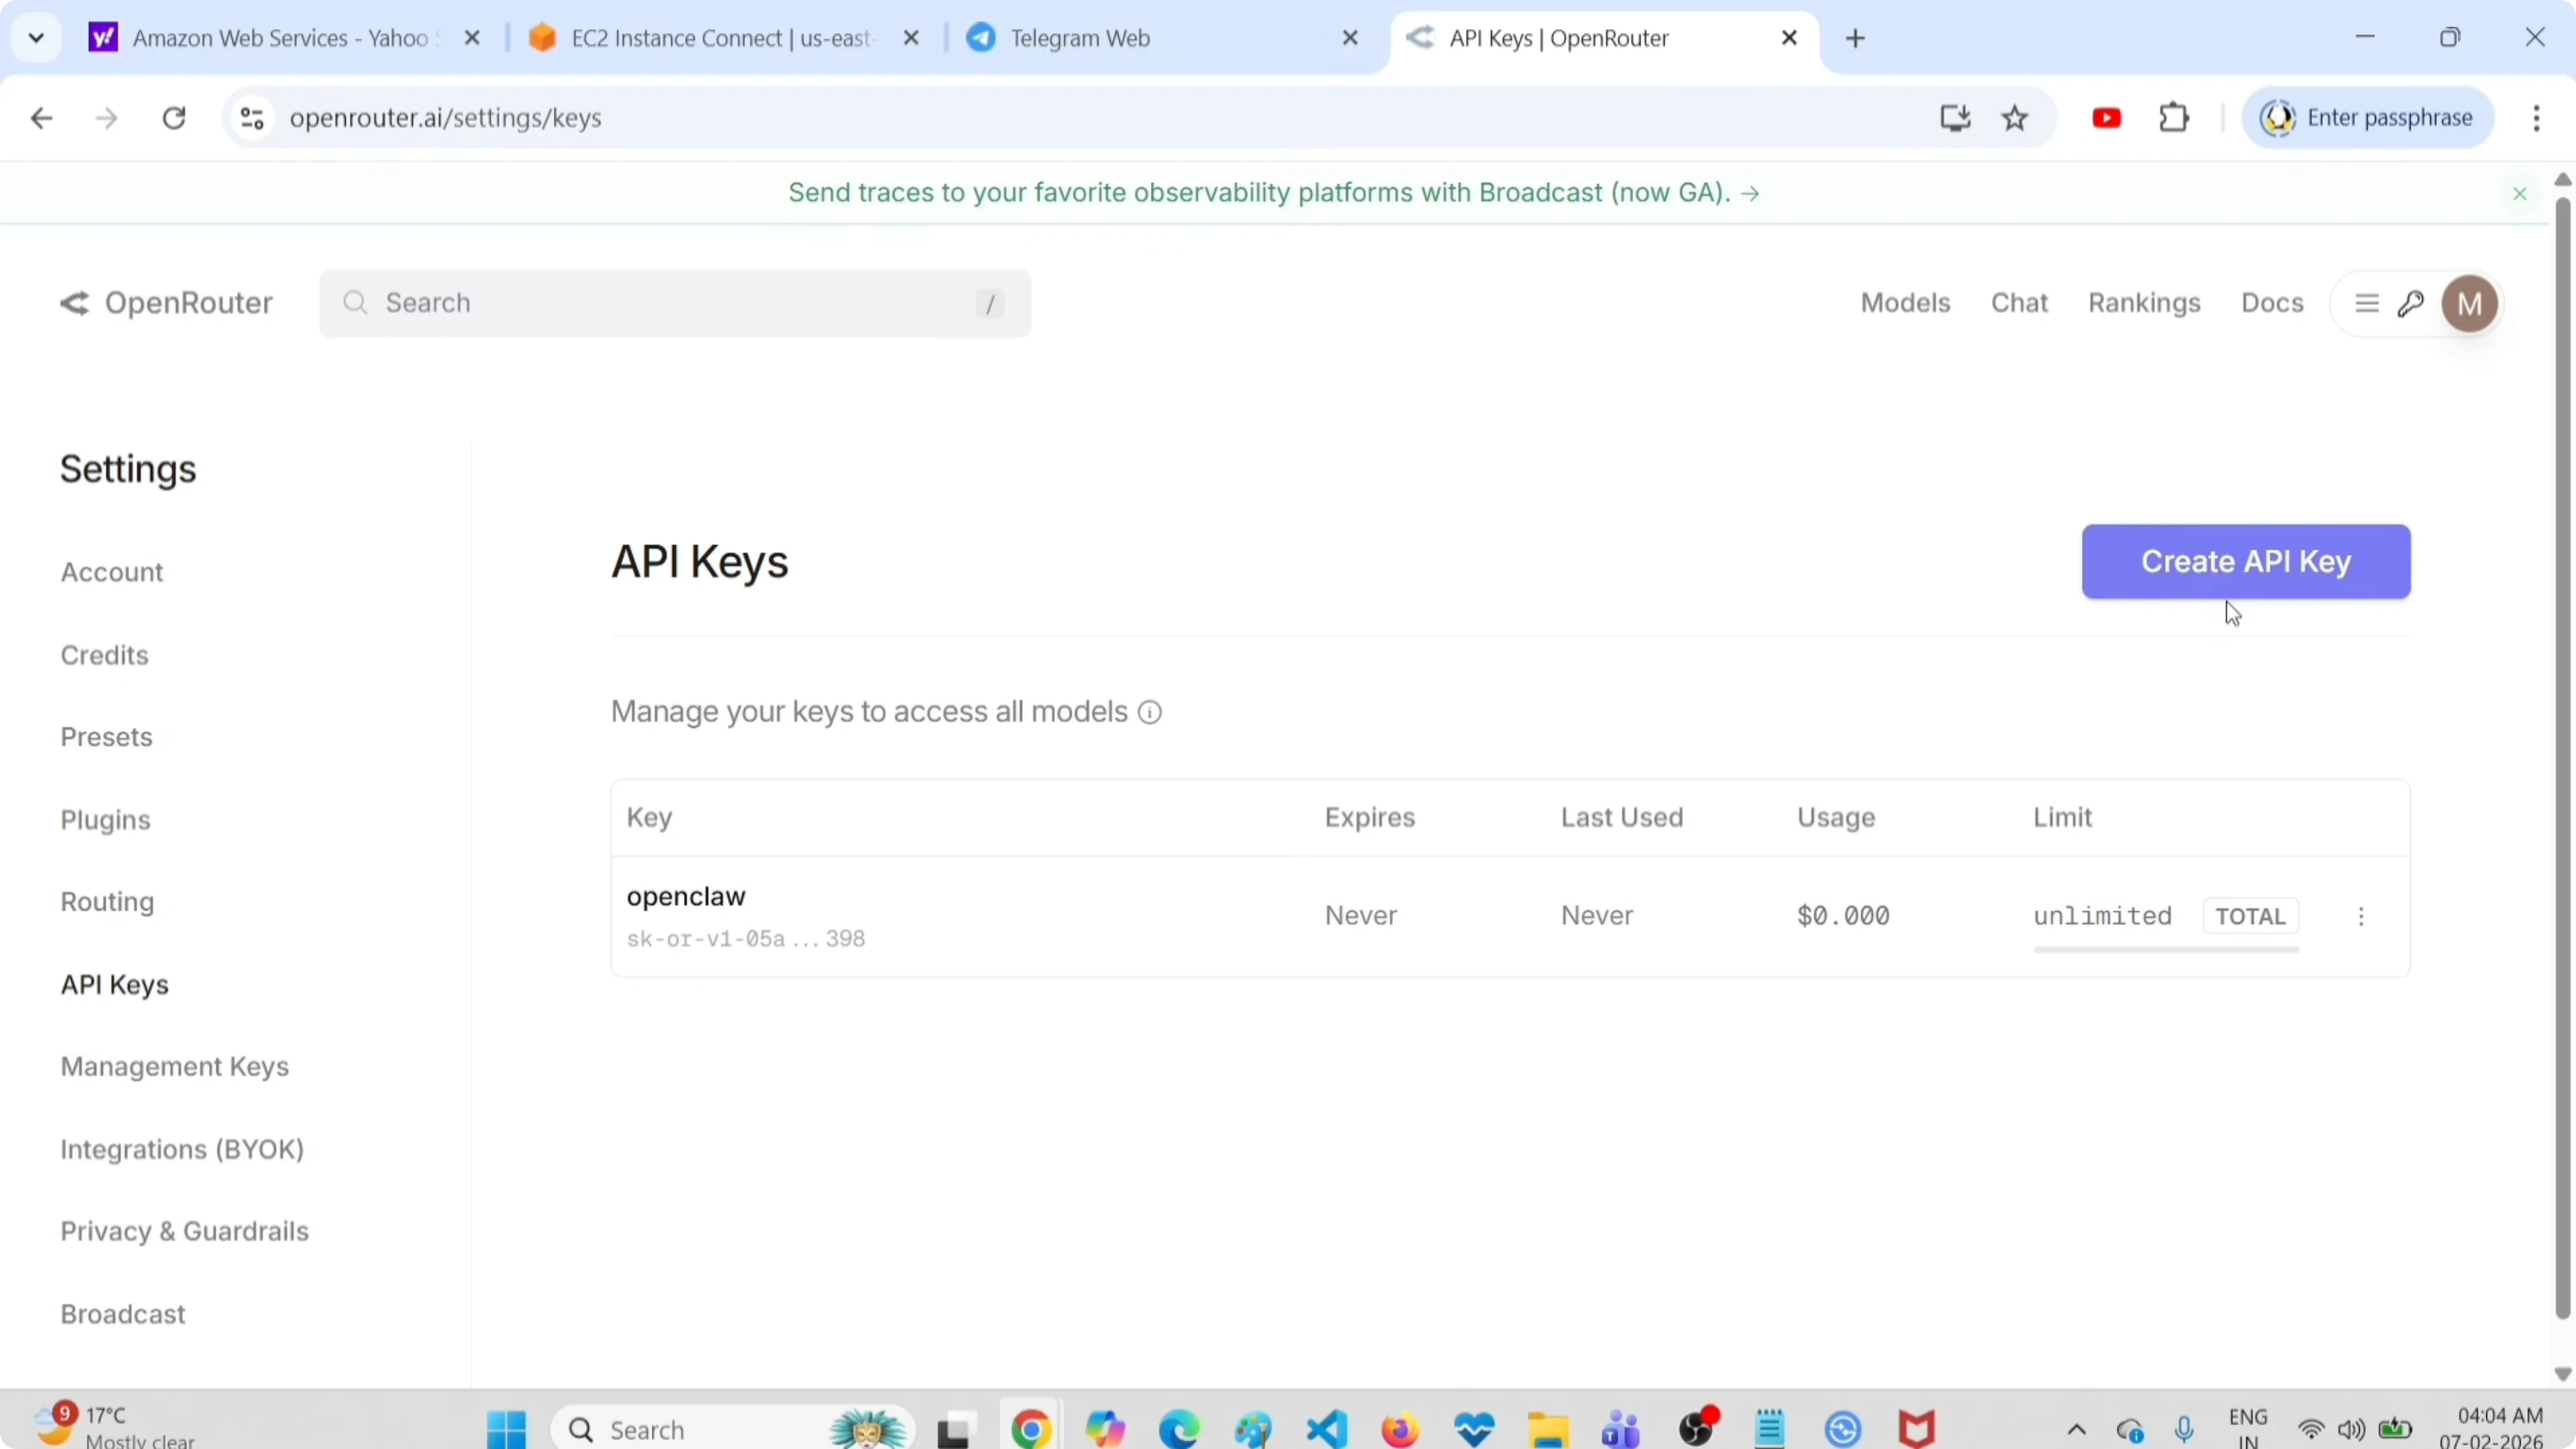
Copy the key and paste it into the wizard prompt. Press Enter to continue.
Need OpenClaw support?
Get in touch for consultation on integrating OpenClaw into your project or infrastructure.
Choose a Free Model
The wizard shows you the list of available models. Pick a free model. I used:
google/gemini-2.5-flash-preview
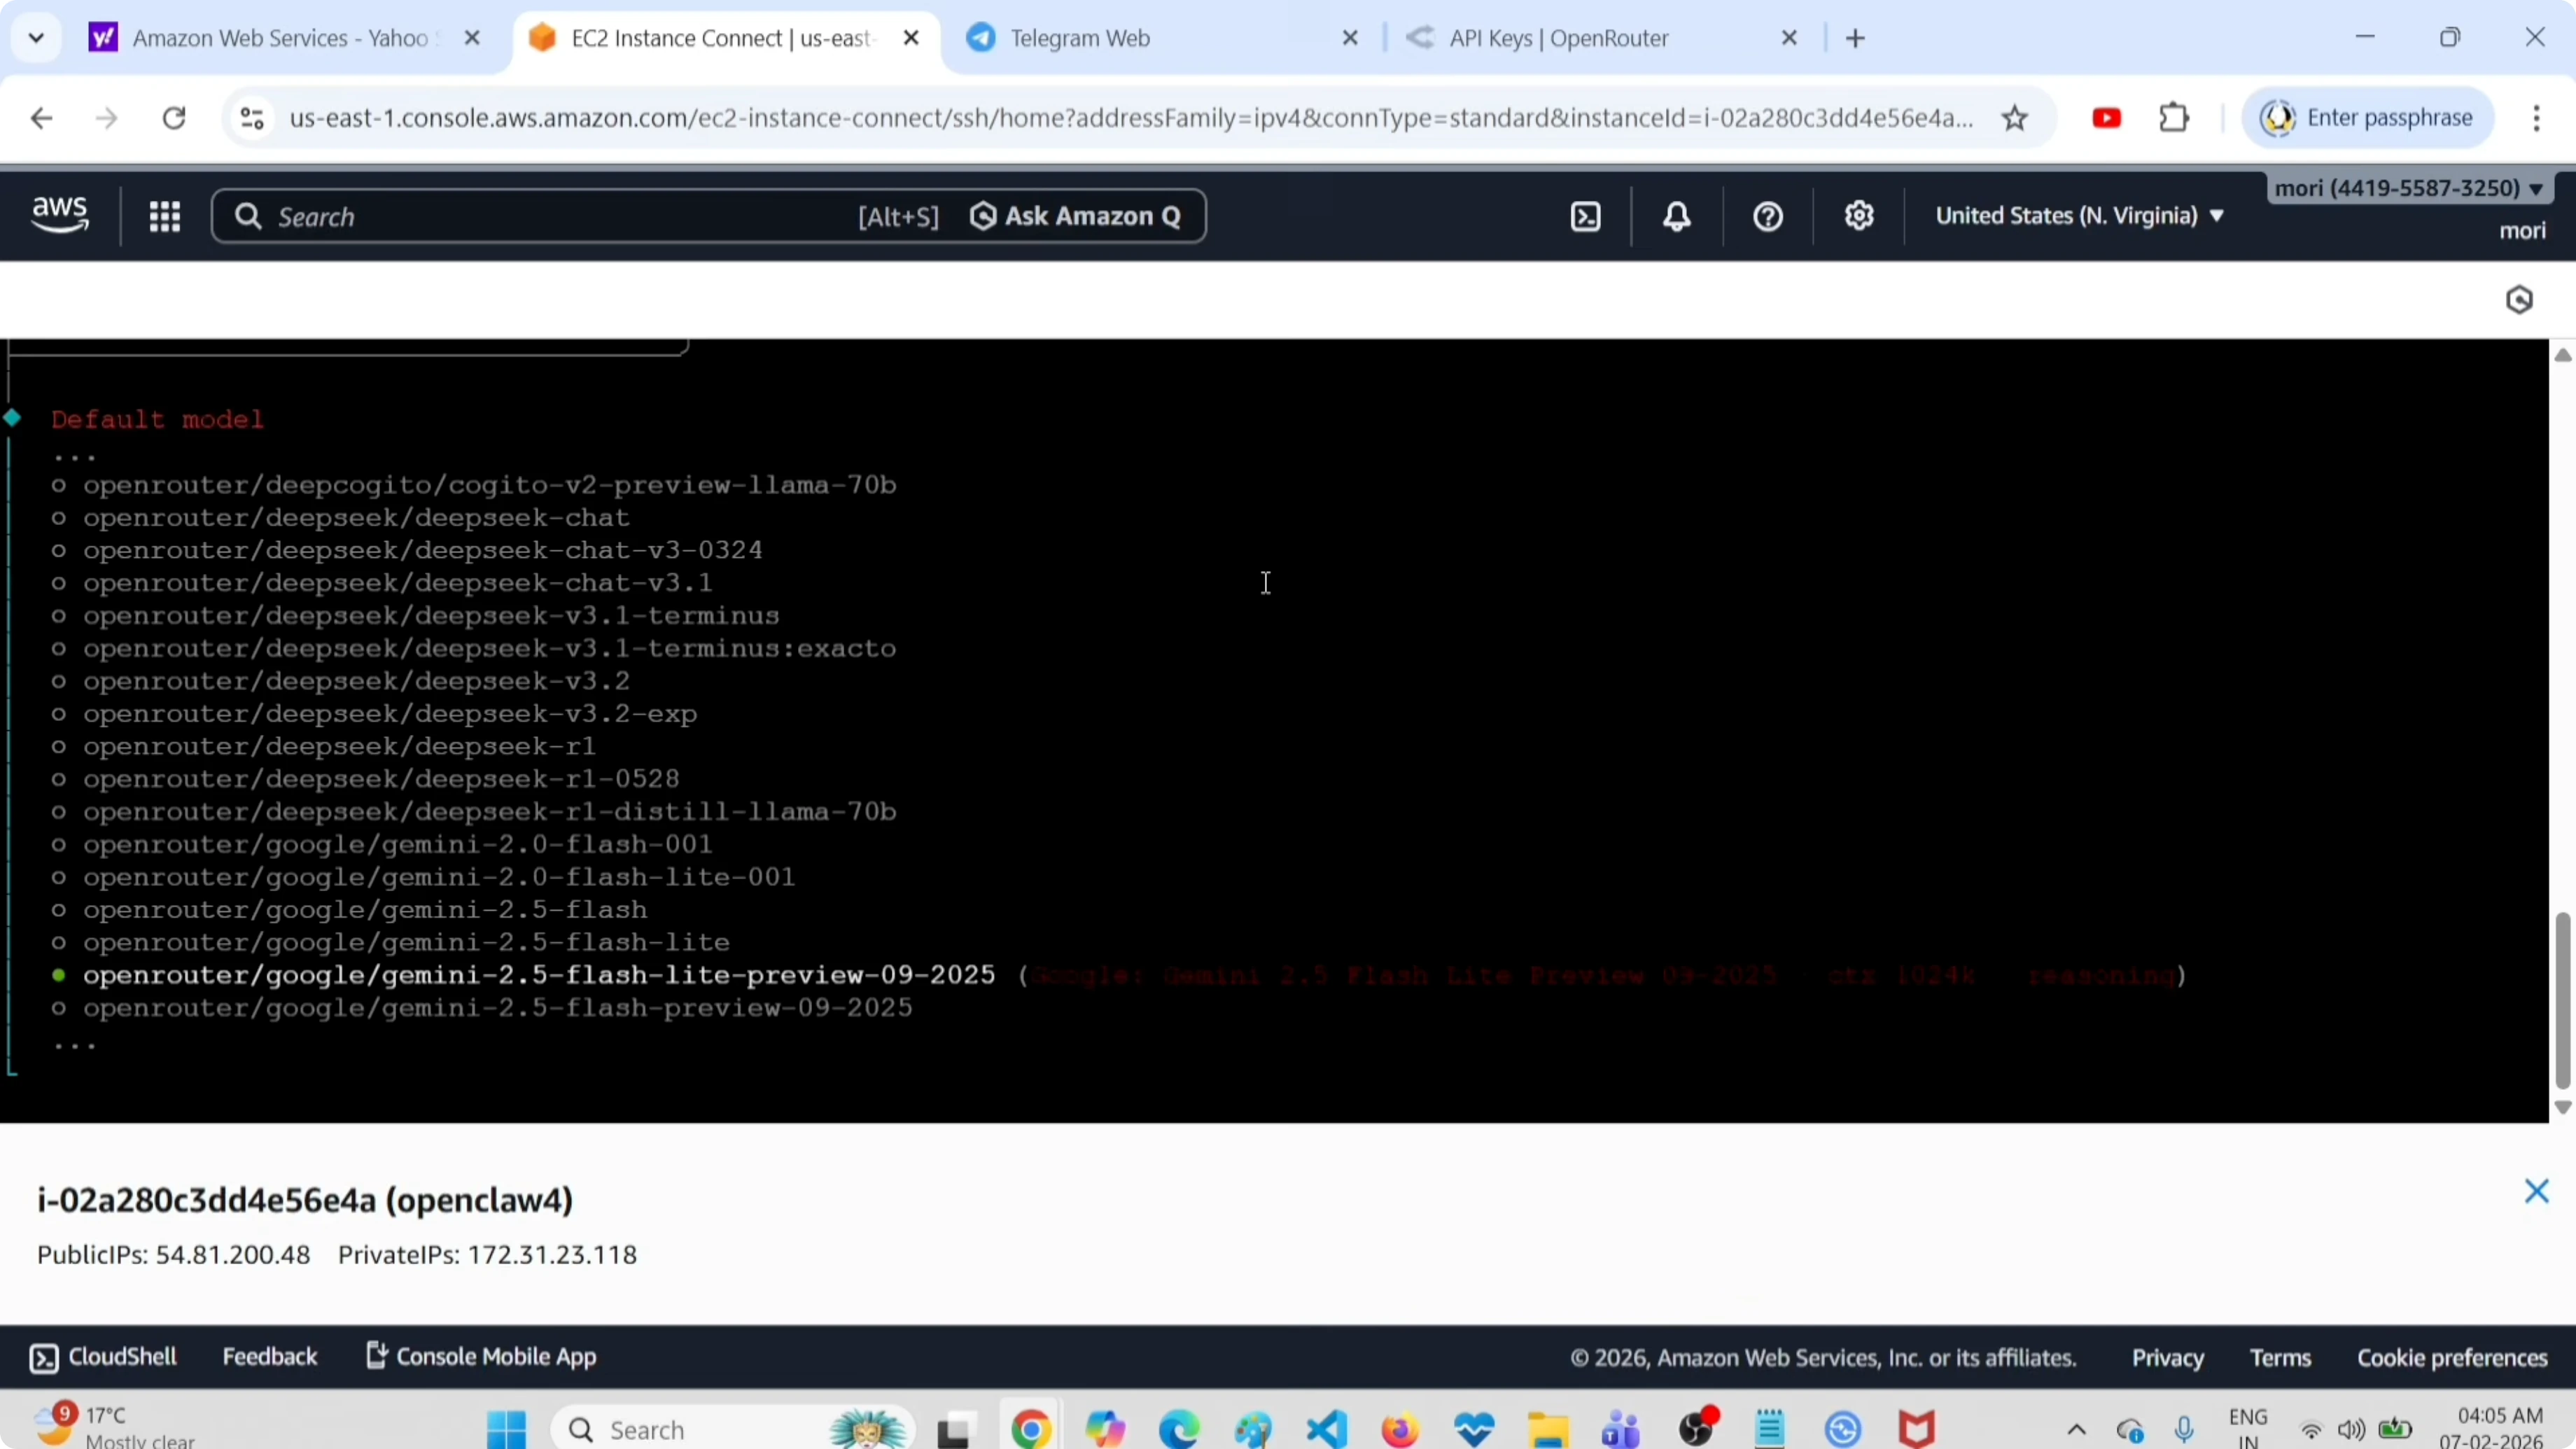
This model works without paid credit. It's perfect for testing, development, and even light personal use.
Configure the Telegram Channel
Now the wizard asks which channel you want to use. Select Telegram.
You need a bot token. Here's how to get it.
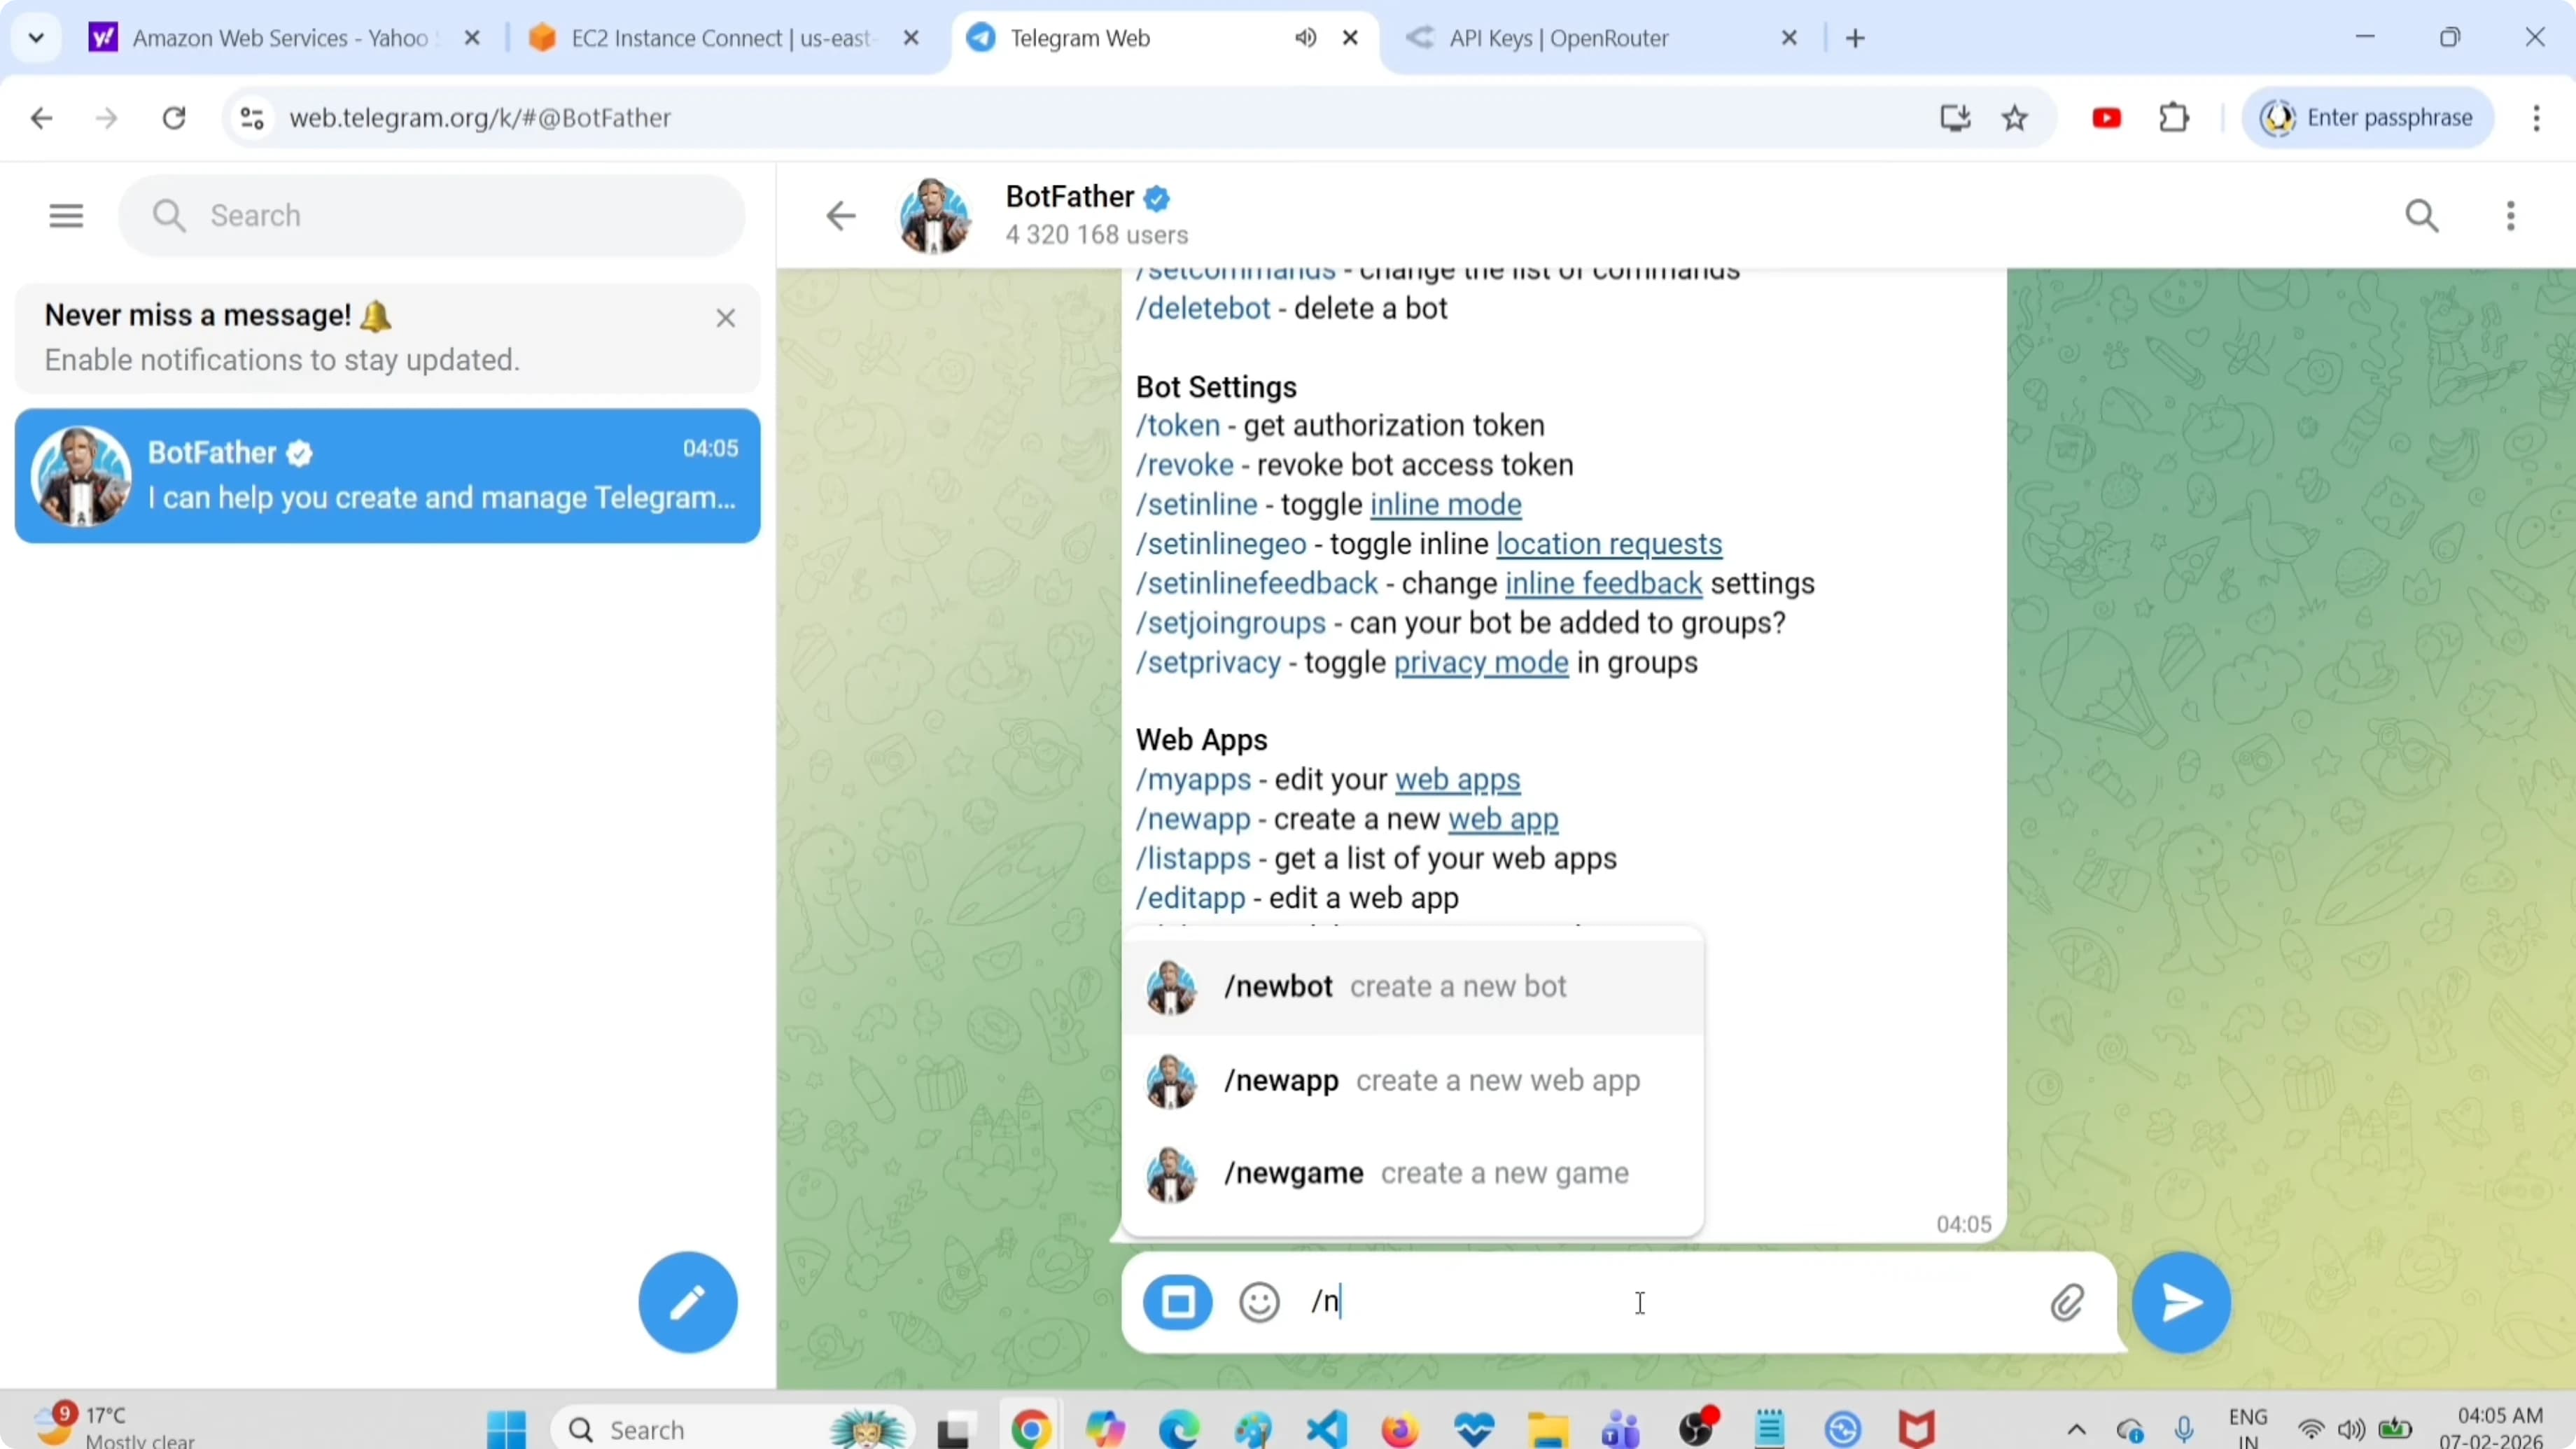
Create a Telegram Bot
Open Telegram and search for BotFather. Start the chat and send:
/newbot
BotFather asks for the bot name and username. Choose whatever you want. When you confirm, BotFather returns the bot token.
Copy the token and paste it into the OpenClaw wizard.
Complete the Onboarding
The wizard asks a few more questions:
- Configure skills now? → No
- Skip for now? → Yes, press Enter
- Attach your bot? → Do this later
- Install shell completion scripts? → No
The wizard starts the gateway service. Wait for it to finish. Setup complete.
Use the Terminal UI
OpenClaw includes a text UI to interact directly from the terminal. Start it:
openclaw tuiWrite a prompt to verify everything works. I tried:
install files in my root directory
If you see a coherent response, the model is responding correctly.
Check out my AI projects
Take a look at what I am working on: automation, AI agents and developer tools.
Pair the Telegram Bot
Open Telegram and start the bot you created with BotFather. The bot asks you to complete pairing.
In the terminal where you opened openclaw tui, you see a pairing command. Copy that command, paste it into the bot chat on Telegram and send it.
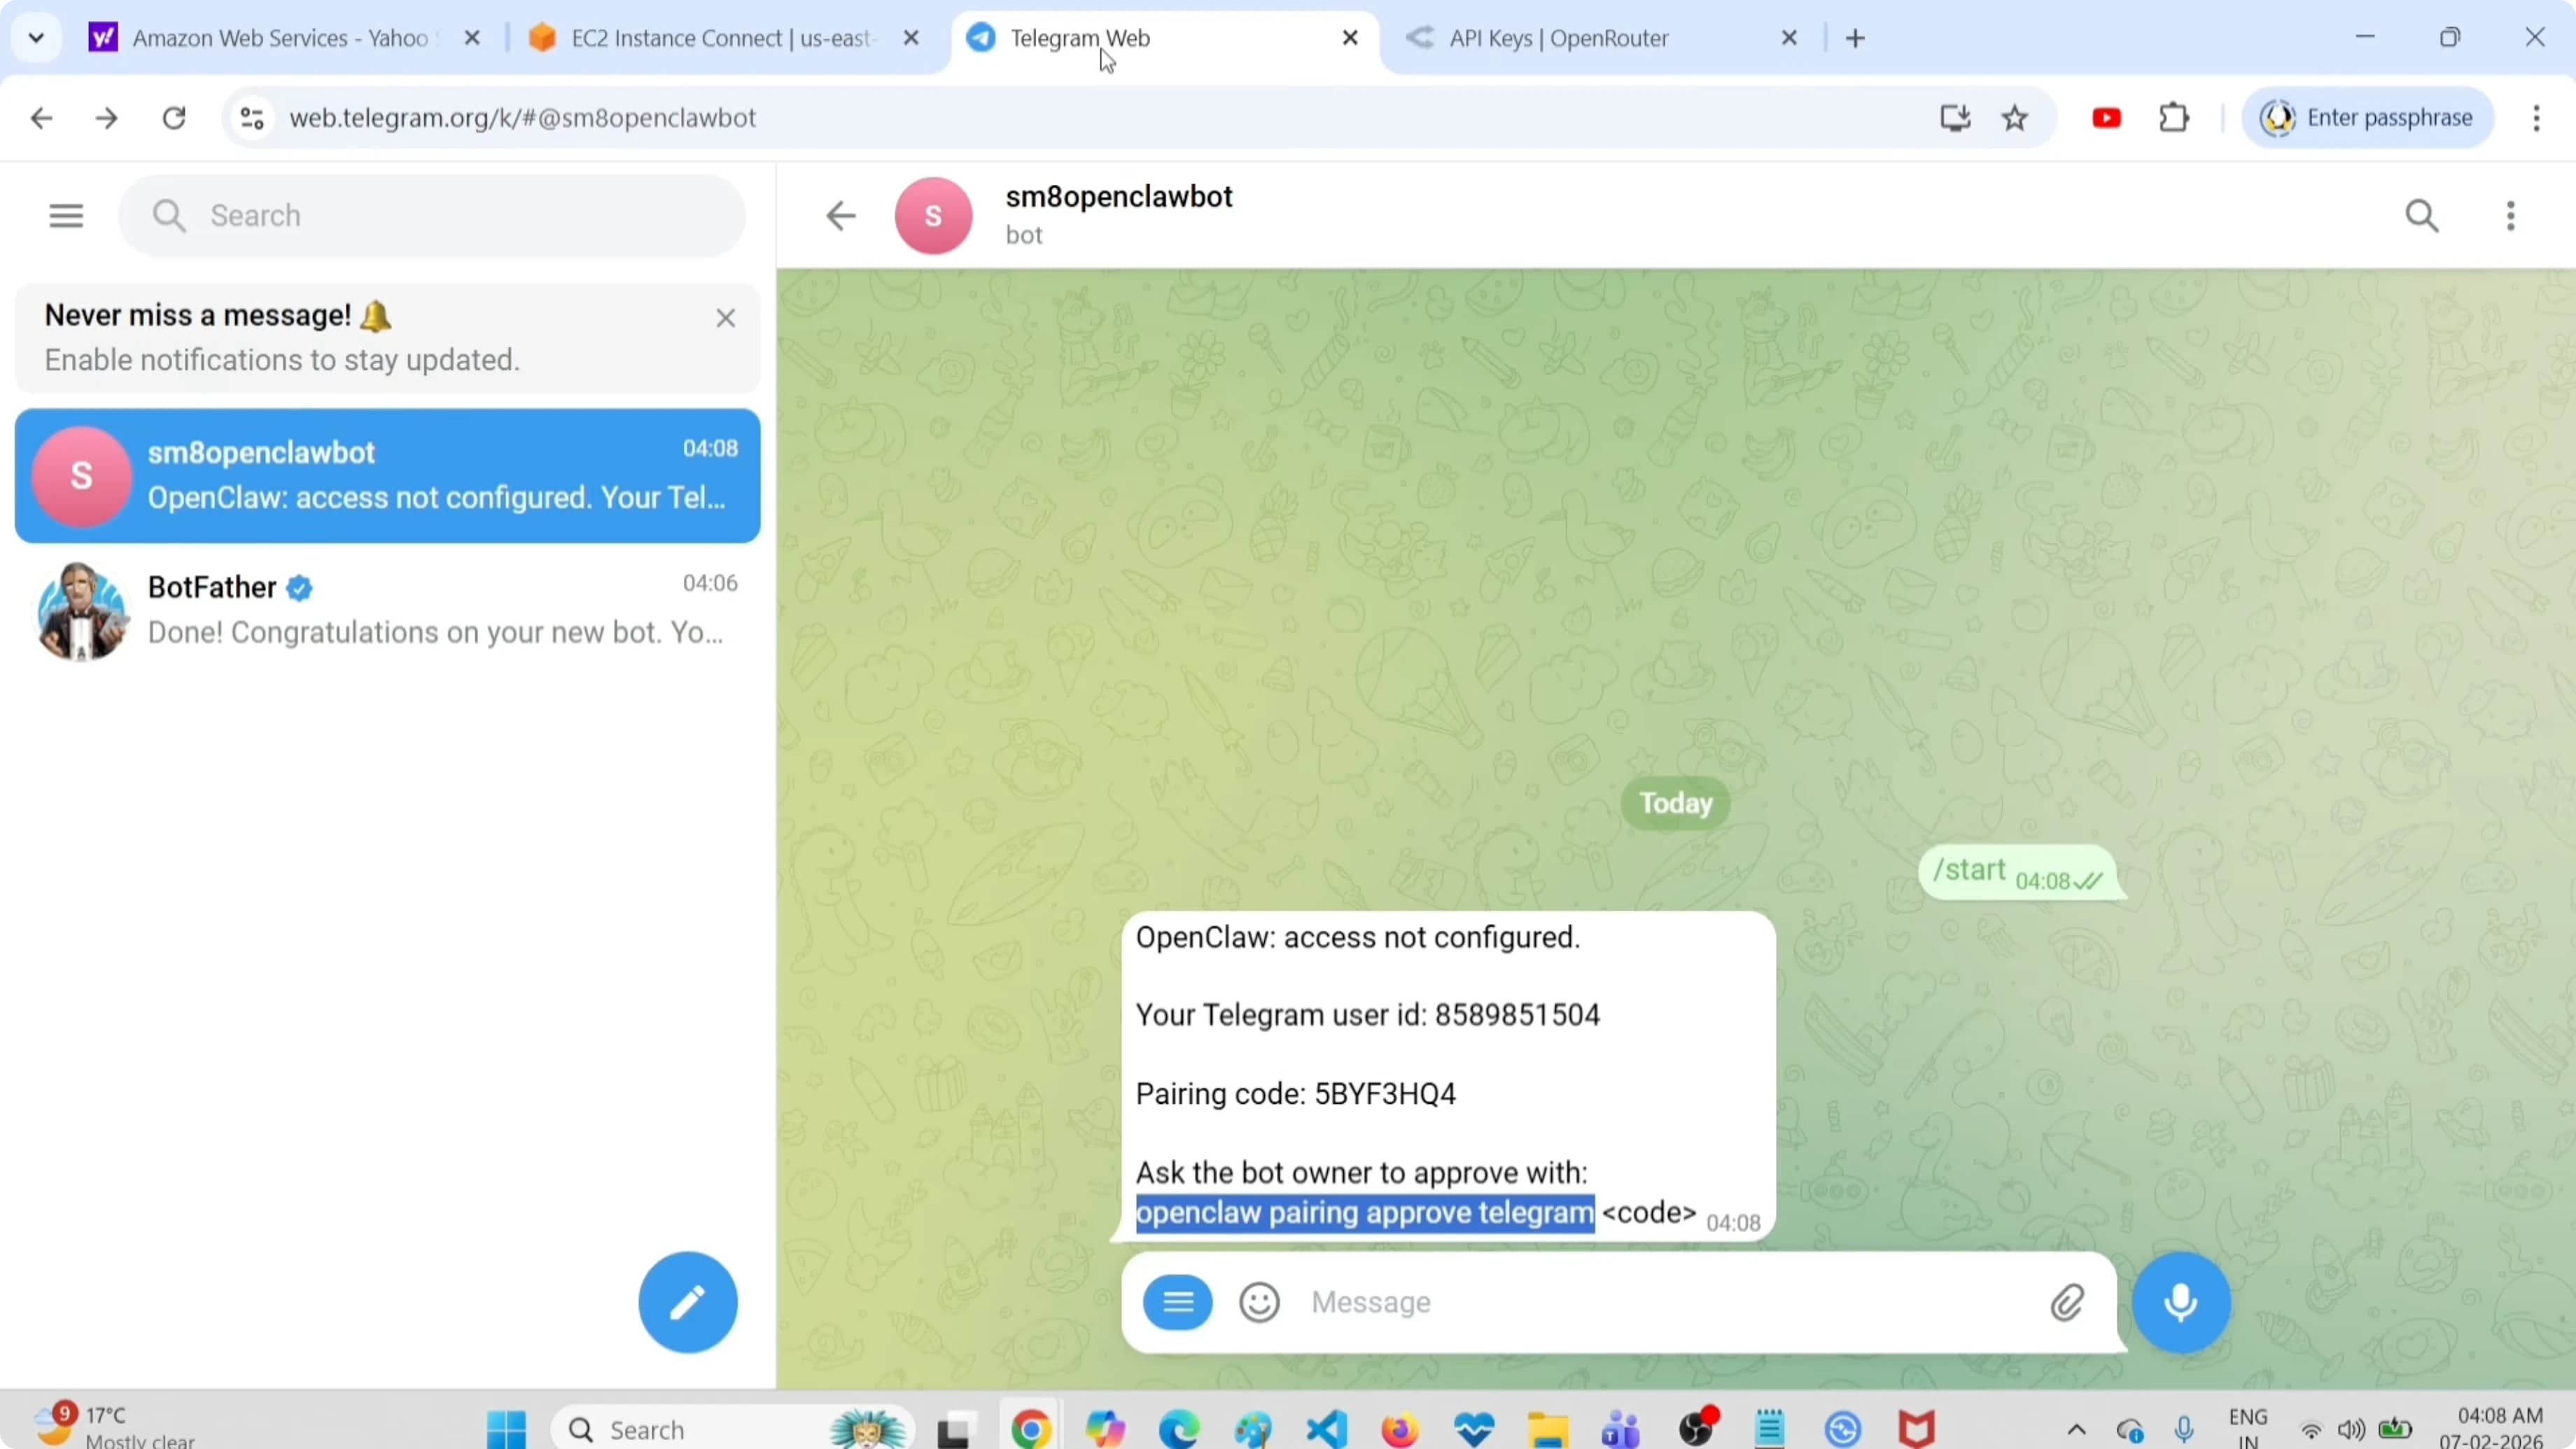
The bot returns a pairing code. Copy that code, go back to the terminal and paste it into the terminal UI. Press Enter.
The system asks you to approve the Telegram sender. Approve it. The bot is now connected.
Go back to Telegram and start testing.
Test the Setup
I sent this message to the bot:
What is the RAM memory of this server? OpenClaw server.
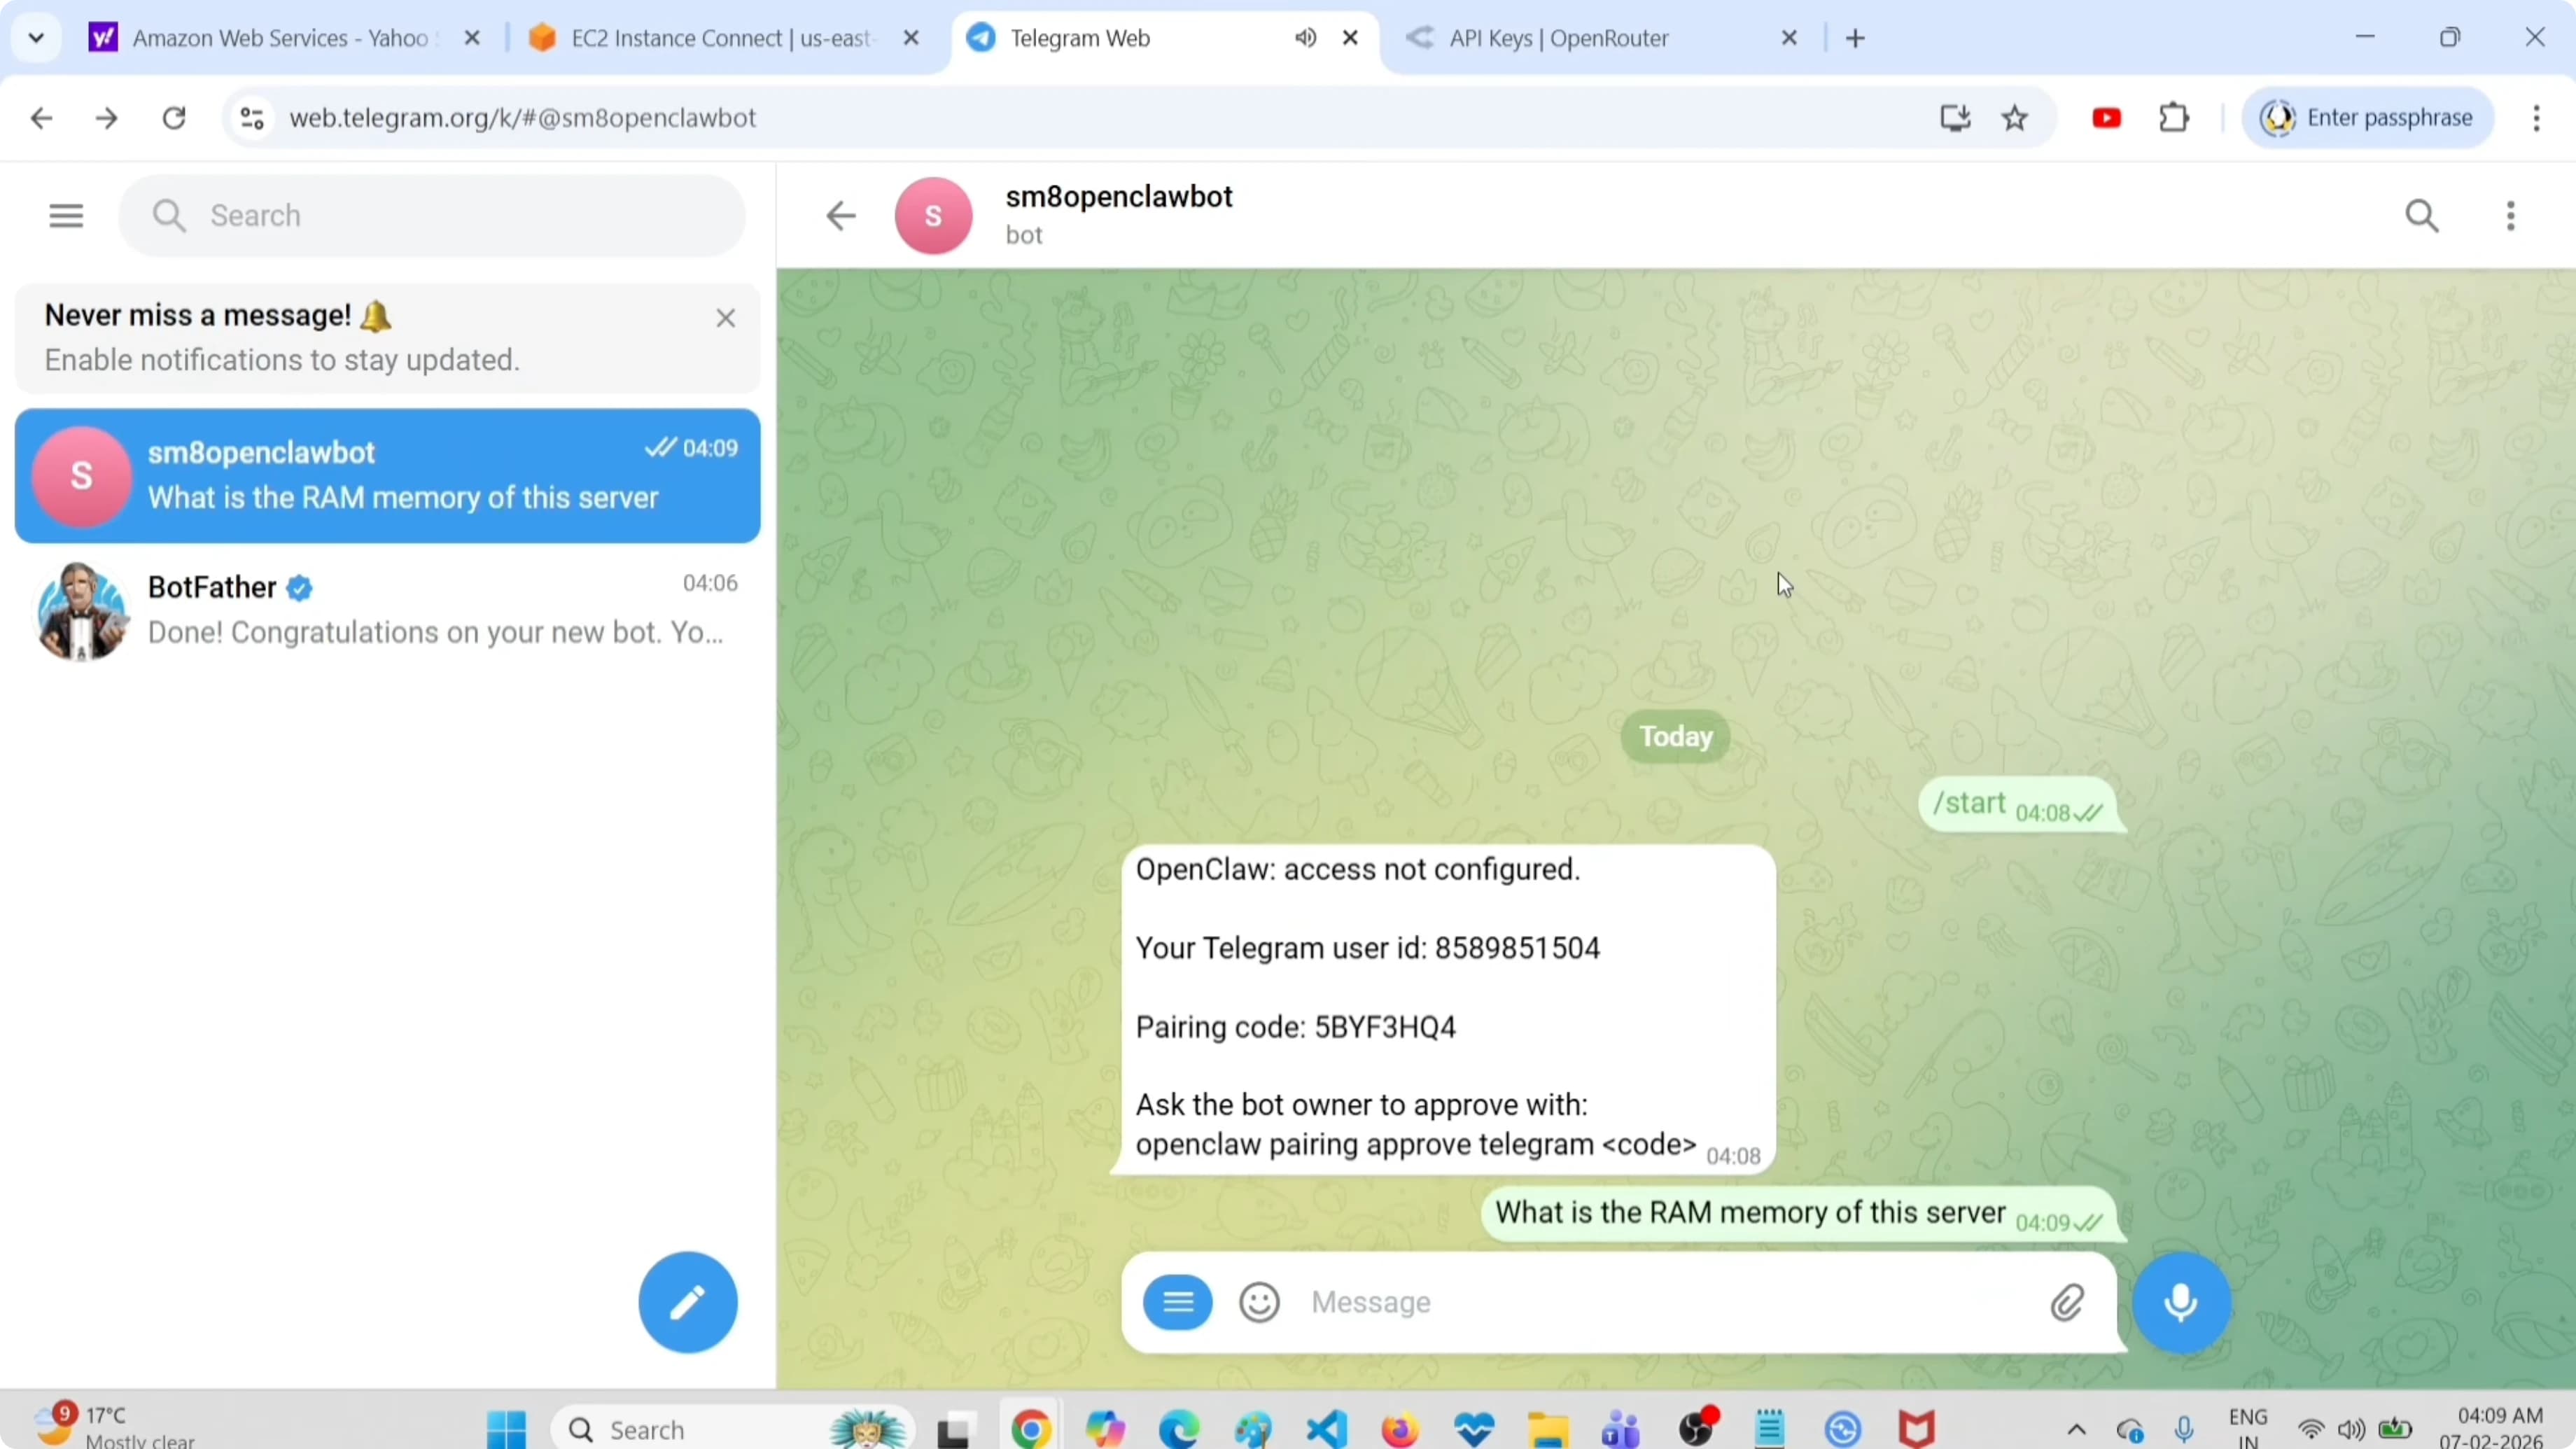
The bot responded with complete details: total memory, used, free, available, swap. This confirms the complete path works - from OpenClaw to OpenRouter to Gemini Flash to Telegram.
If you prefer to use local models instead of free cloud options, you can configure Ollama with OpenClaw and skip external API keys entirely.
What I Used
Let's recap the components of this zero-cost setup:
- Provider: OpenRouter (free API key)
- Model: google/gemini-2.5-flash-preview (free)
- Channel: Telegram bot (free)
- Interfaces: Terminal UI + Telegram chat
Everything configured with the onboarding wizard. No cost, no initial limits.
Troubleshooting
The wizard doesn't find OpenRouter?
Make sure you chose "OpenRouter" from the provider list. If it doesn't appear, update OpenClaw to the latest version.
The model doesn't respond?
Check that your OpenRouter API key is valid. Go to openrouter.ai/settings/keys and verify the key exists and hasn't expired.
The Telegram bot doesn't connect?
Verify the bot token. If you copied it wrong, you can regenerate it with BotFather (/token) or redo the onboarding.
The terminal UI gives an error?
Check that the gateway is active with openclaw gateway status. If it's not running, do openclaw gateway start.
Final Thoughts
This setup proves you can use OpenClaw without paying anything. OpenRouter offers free API keys with reasonable limits for experimentation and personal use. Gemini Flash is fast and reliable.
If you later decide to scale or need more powerful models, you can always switch to premium keys or configure local models with Ollama - but to get started, this works perfectly.
I use this setup to test skills, try multi-agent configurations and run experiments without worrying about costs. Zero friction, zero surprises.
